summary

Cooking without a safety net

Thursday, December 18, 2014

When the cows come home, eat them.

We realized when we got back from the farmers market that we already had ground beef; since we had just bought more, the week's challenge became: use ground beef.  My first thought was to make a "Cowherd Pie," because shepherd's pie sounded good, but we didn't have any lamb.  Then I found out that a shepherd's pie with beef already has the (uninspired, and inexplicable) name "cottage pie," and is usually found in England and Australia.

I love when articles online say that a food is "found" in certain areas, like it's a wild species roaming free across the African veldt until someone sticks a serving spoon in it and puts it on the table.

I also found out that shepherd's pie (and cottage pie) is usually topped with a baked layer of mashed potatoes, which was a little confusing, because I thought I'd had it with a pastry crust.

I didn't want mashed potato topping.  I wanted biscuit topping.

Hence, I give you the first draft  of "cabin pi."  Cabins are almost the same as cottages, but more rustic and American, like biscuits.  "Pi" because math, dammit.  And because mine was round, not baked in a rectangular casserole.

Here's what you need:

  • 1 lb ground beef
  • 3/4 to 1 C carrot, sliced
  • 1 C onion
  • 1 C bell pepper (pick your favorite color.  I only used it because I had one in the fridge)
  • 2 cloves garlic, minced
  • 8 oz sliced mushrooms
  • 1 C broth (whatever's handy)
  • 1 1/2 C frozen veggies (I had peas and corn.  I also only meant to use 1 C, but I over-poured, and it was too much trouble to pour the frozen corn back into the bag)
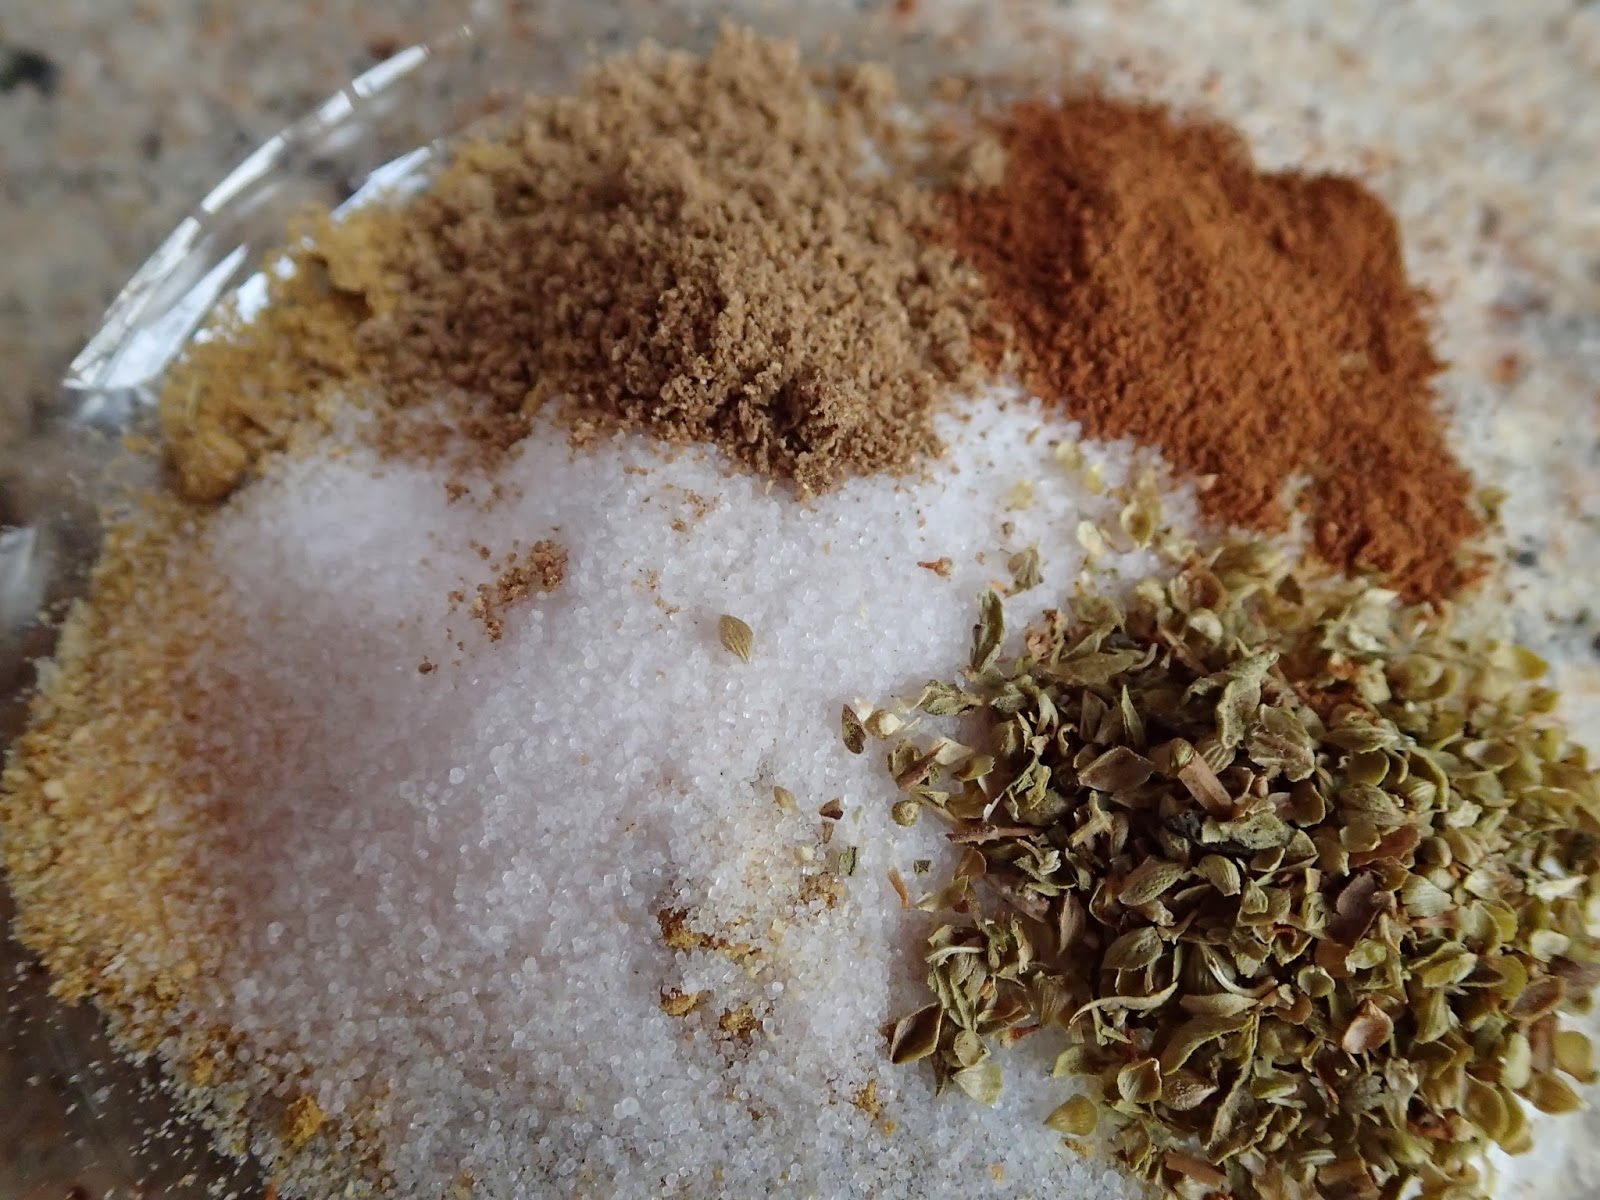
  • kosher salt
  • black pepper
  • rosemary
I also meant to include thyme and Worcestershire sauce, but I forgot both.  Maybe I should have organized my notes better.

Also, for biscuit topping (because if you don't use a biscuit topping, then it's not a TRUE this thing I just made up):
  • 1/2 C melted butter
  • 1 1/2 C milk
  • 1 1/2 C flour
  • 1 1/2 t salt
  • 1 1/2 t baking powder
Here's what you do:
  • Preheat your oven to a piping hot biscuit-baking temperature of 400F.
  • Brown the ground beef in a deep skillet, seasoning with salt, pepper, and rosemary.  If you're rollin' like a cabinite, use cast iron, because it will save a step later.
  • Add the carrot, bell pepper, and onion.  Cook until tender-crisp, stirring occasionally.
  • Stir in the mushrooms.  Give them a few minutes to soften and soak up juices.  Stir occasionally.  Add the broth (thyme and Worcestershire), bring to a boil, then reduce heat and let the whole mess simmer a few minutes while you get the biscuit topping put together.
  • Make your biscuit topping.  Mix all those ingredients together.  Easy, right?  Pro tip: don't use this recipe to make actual biscuits.  It is WAY too runny for that to work.
  • Add frozen veggies to the meaty mixture.  Give them a stir, too, since we've developed a habit.  Let it cook for another four or five minutes, then turn off the stove.
This is what I had before adding the topping.
  • Remember when I said deep cast iron could save you a step?  It's this one.  You can either pour everything into a baking dish (I'd suggest a 9x13, but I'm just guessing.  I know the beef mixture doesn't look like much, but those biscuits will rise.), or go to the next step.
  • Pour the biscuit topping over the meat mix, trying to cover it evenly.  Scrape the bowl with a spatula--you want all the biscuity goodness you can get in there.
  • Bake until biscuits look done (golden to golden-brown).  Mine took about 45 minutes.

See? Doesn't that look tasty? Looks are NOT deceiving.  It was fantastic.

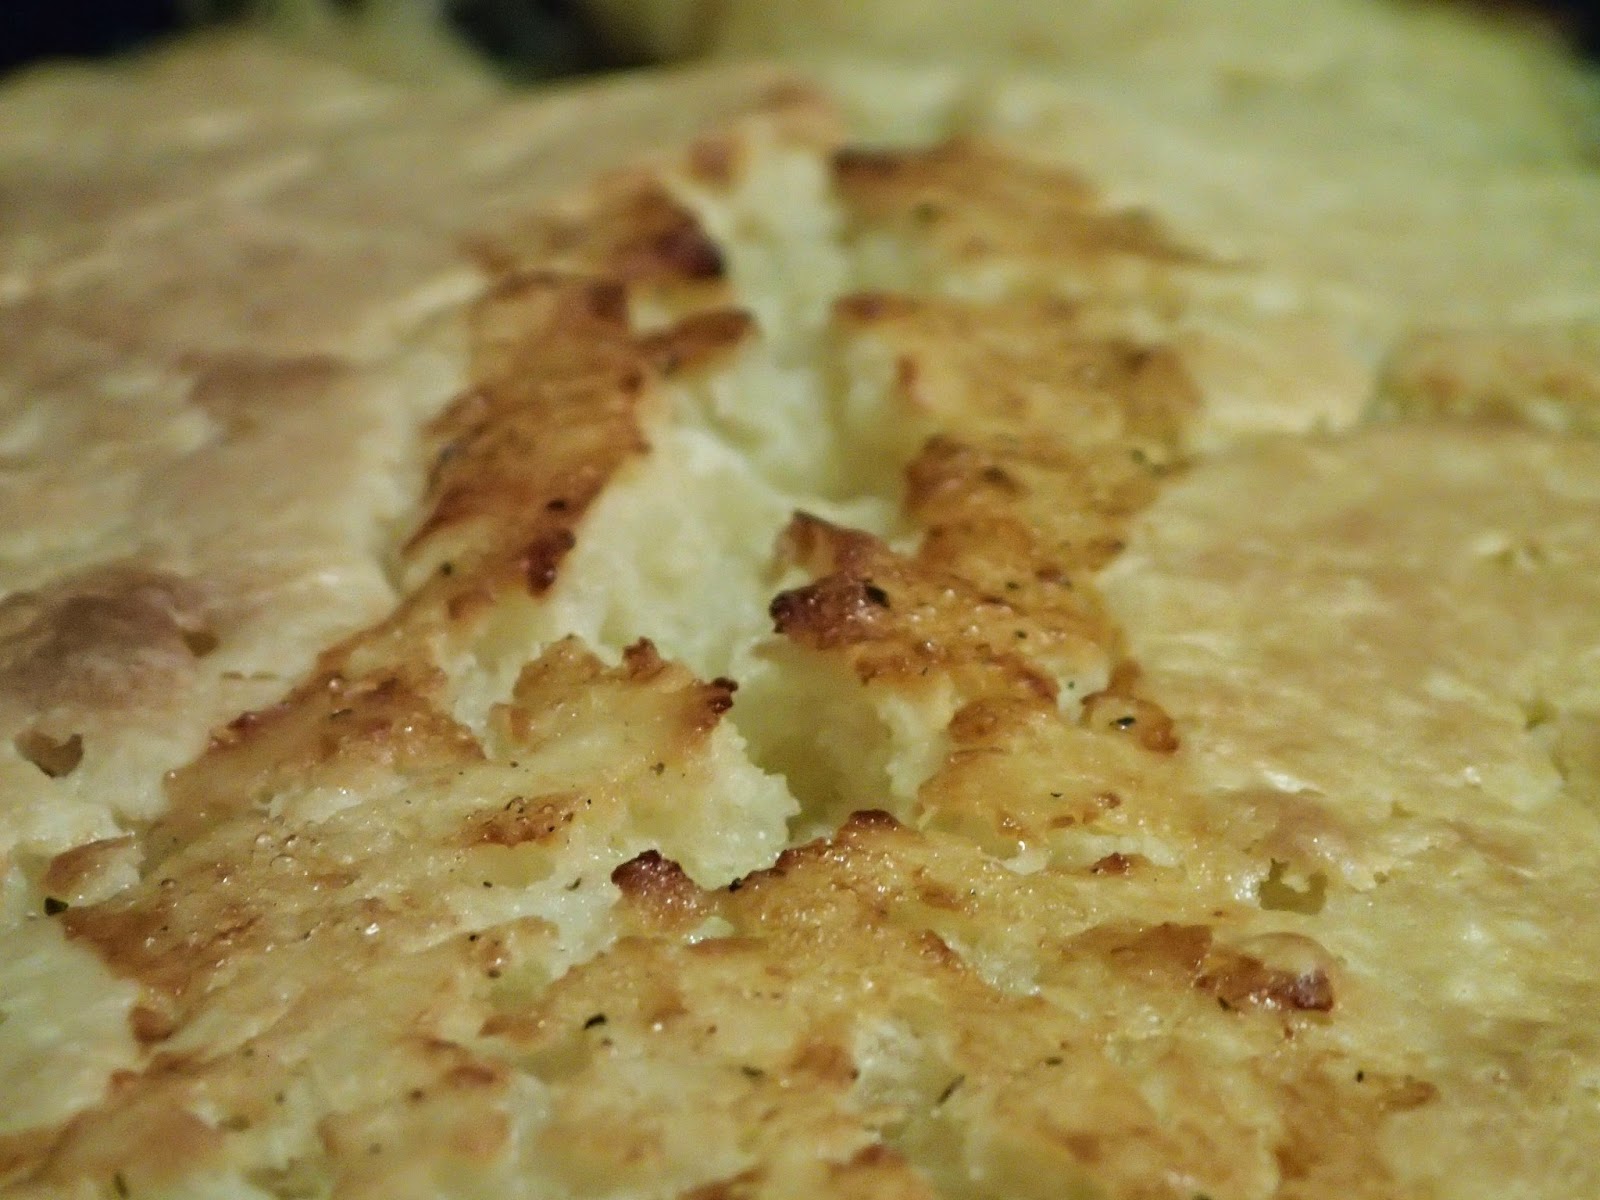
"That's no canyon... that's my dinner!"
The results were fantastic, and I say that as a thoroughly modest person.  Only an effort of supreme will kept me from eating the entire pan full of food and making the Chief Taster watch; she was similarly afflicted.  I still wish I'd included the Worcesterchire and thyme, but that's ok--I'll make this again.  I might even try it with beer instead of broth.  Now THAT'S a cabin pie!

Thursday, December 4, 2014

the song oversold it

The Chief Taster bought a few chestnuts, because she wanted to try roasting them.  She has a brutal addiction to Christmas music, and while I greatly appreciate that she keeps it in check until the day after Thanksgiving, I also blame that addiction for this experiment.  Not that it was a failure, but we were both a little disappointed with them.  What's the big deal?

Fresh chestnuts should bounce like a tennis ball.  I learned this during my research, and enjoyed whipping the chestnuts down at the kitchen counter while she watched, offering no explanation about what I was doing.
Score the flat side of the chestnuts enough to cut through the outer peel.  Then score them again, making an X-shaped cut.
This one isn't cut quite deeply enough, but you get the idea.
While you bounce and score your nuts, preheat the oven to 425F.  When it's ready, roast the chestnuts on a baking sheet or in a shallow dish (I used an 8x8, because we didn't have many nuts, and it allowed me to shake the dish to turn them while baking more easily than I could with a flat baking sheet) for 30-40 minutes, shaking the pan every few minutes to make sure the nuts cook evenly.


When they are done, give them a few minutes to cool, then peel them using fingers or a knife.  We tried sprinkling them with salt, cinnamon, cumin, and curry powder.  Not all together.  Salt was best, but they still just tasted like potato to me.  Later, we found that after roasting, some people like to fry them in butter.  Maybe we'll try that next.

Thursday, November 20, 2014

Better for leftovers

Each week, I try to figure out what to make for dinner.  Each week, I waffle between tried-and-true and something new.  I tend toward the second option because I feel like I need a new challenge.  Often, once I've tried a new recipe, I feel like I have a pretty good handle on it.  Besides, when I try new stuff, I learn new stuff.  And I want to learn new stuff.

The problem lies in deciding what new stuff.  Familiar things are easy to remember; new things are harder to name, unless it's something with a popular name, which usually means it's well known because it's not very easy to make; the sort of thing you only get at restaurants, because who the hell makes it at home?  Once, when I was pretending to be a nurse, my aunt asked me what I wanted for dinner.  She did this often during that period: delivering a meal about once a week because she knew how much it helped.  I started running out of ideas, and said something ridiculous, never thinking she'd actually make it.  "Chicken Kiev," I told her, figuring it would be like the items I put on my Christmas list and never expected to see (the Red October sub; a yellow sports car; a penguin who could make me waffles for breakfast).  Then she went and made it.  I had no idea how laborious it would be.  Hell, I didn't even know what it was until she showed up with a baking dish full of dinner.  It was just some words I'd heard used together.  After that, I went back to casseroles for all of my requests.  I felt guilty.

Lately, I've started to feel burnt-out on texture.  I wanted something crispy, but when you look for recipes using the word "crispy," all you get is fried chicken and kale chips, and half of those recipes are attempting to rip off The Colonel, whose work never impressed me that much anyway.  Then we went out for Thai food, and I saw fried rice on the menu, and felt inspired, even though it's not crispy.  At least it was something I'd never (successfully) done.

I used this recipe, but I changed it a little.  I didn't use prepared (parboiled) rice because I didn't want to take up valuable space in my kitchen cabinets with a third kind of rice.  I just cooked 2 cups of brown rice the way I usually do, and continued from there.  That was my first mistake.  Not the brown rice--using 2 cups of it.  My second change was of necessity.  I couldn't find roasted pork at the grocery, and I couldn't find an Asian grocery near our place, so I chopped the three chicken thighs I had in the freezer into little pieces and threw them in the skillet to cook before adding the veggies.

The egg cooked beautifully, just as suggested in the directions.  I'd tried making omelets for breakfast Sunday morning, and they didn't turn out half as well as the big disk of egg I used in dinner Tuesday.

I was halfway done adding the rice when I realized I needed more space.  A lot more.  If you're making this meal in your trusty 12" Lodge cast iron skillet, switch to something larger (got a Combo Cooker?) as soon as possible.  Once I'd dumped one big pan into an even bigger pan, I gave it all a good stir and decided two things.  First: I did not need the second half of the rice.  Second: I might need a little more sauce.

Lesson learned: Fried rice is a great way to use up yesterday's leftover steamed rice.  Adjust quantities of all other ingredients to suit.

On the plus side, the Chief Taster really liked it, even declaring "it looks just like the real thing!"

...even if it wasn't crispy.


Thursday, October 30, 2014

lamb and things

This week's recipe comes from the excellent and gorgeous Pomegranates and Pine Nuts, by Bethany Kehdy.  She calls it "Auntie Anwar's Mansaf Risotto," but I don't have an Auntie Anwar, I don't know what "mansaf" means (until it occurred to me to check Wikipedia while writing this sentence), and I didn't know until after making this for dinner that risotto is just a rice dish.  I don't know what I thought it was instead, but I thought it was somehow more complicated than "rice in broth."  Hey, I learned stuff!  Kehdy mentions in the book that she has "tweaked" her aunt's recipe.  You'll notice I kept tweaking, or more accurately, I got lazy about sourcing some ingredients.

Bethany's Auntie Anwar's Lamb and Rice and Yogurt Stuff
2 T butter
30 ounces lamb shank(s)
2 carrots, roughly chopped
1 onion, quartered (I think onions are getting really big, so I quartered half an onion, and I think it was enough.  Do what you will)
10 garlic cloves.  Mince 5, leave the other 5 whole.
6 cardamom pods
1 bay leaf (sticking with Dad's tradition, whenever the recipe says "1 bay leaf," I use 2.)
1 cinnamon stick
1 C short-grain or risotto rice (I didn't want a third kind of rice in my tiny kitchen, so I used long-grain brown rice.  The nice thing about serving a new recipe to people who've never had it before is that as long as they think it tastes good, they won't know you did it wrong)
1 t turmeric
3 1/4 C Greek yogurt
1 egg
1 T cornstarch, if needed (I didn't.  The yogurt looks pretty runny when it first starts to cook, but thickens if you give it a little time)
3 T pine nuts
3 T blanched almonds (I couldn't find these, so I used sliced almonds.  I'm too lazy to blanch my own almonds unless the recipe makes a sufficient case as to why blanching matters)
juice of 2 lemons (I used 4-6 T lemon juice from a bottle)
mint leaves, finely chopped, to sprinkle as a topping
salt and black pepper

  1. Melt the butter in a large, heavy-bottomed saucepan.  I used my Lodge combo cooker, because I use it whenever I get an excuse.  Add the shanks, carrots, onion, whole garlic cloves, cardamom, bay leaf, and cinnamon, and cook 4-5 minutes, turning frequently, until meat is brown.  Salt to taste, then add 5 C water and bring to a boil.  Reduce heat, cover, and simmer 1 hour, until meat is tender and falling off the bone (Mine wasn't quite "falling off" the way I expected, but it was pulling away from the bone, and I figured it was ready).  Strain well, reserving stock and meat, but discarding veggies and spices.  (Have you ever boiled a cinnamon stick?  It unrolls, and looks like a curled cinnamon sheet.  Neat!)
  2. Put the meat in a bowl to cool a little.  We'll get back to it later.  For now, put the rice, 3 1/4 C of the reserved stock, and the turmeric in a separate saucepan, bring to a boil, reduce heat, and simmer 25 minutes, until rice is cooked.  You can add broth and stir as needed to get a creamy, risotto texture, but if you're like me and have no idea what you're doing, nor what risotto is supposed to be, you'll probably skip the extra broth and be ok.  Season with salt and pepper.
  3. While the rice cooks, cut the meat from the bones and hack it into smaller, bite-size pieces.  Put the yogurt into the pan you used to cook the meat and cook over medium heat.  Whisk in the egg.  Add the meat and bring the whole mess to a gentle boil.  Reduce heat and simmer, stirring often, 15-20 minutes, until the yogurt is thick and creamy.  If the mixture is too runny, you can add the cornstarch and mix well.
  4. Toast the pine nuts and almonds in a little skillet 1-2 minutes, shaking frequently, until golden.
  5. Mix the crushed garlic and lemon juice in a small bowl.  Bethany serves hers for a whole table, but we have a small table, and two guests for dinner that night, so I made individual servings.  Put a round of Arabic bread (see below) on each plate.  Pour some of the lemon mixture over the bread, spoon on some rice, then some of the lamb-yogurt sauce.  Top with chopped mint and toasted nuts.
Bethany's picture is a whole lot prettier than mine, but she's done this before.


Arabic Bread
2.5 C bread flour (unbleached all-purpose also works)
1/2 t salt
1 t sugar
4 T olive oil
2 t yeast

  1. Mix flour, salt, and sugar in a large bowl.  Add olive oil and mix well.
  2. Add yeast to 2/3 C warm water and stir until it dissolves.  Pout yeast mixture into the flour mixture, a little at a time, combining it with your hands until a ball forms.
  3. Knead the dough on a clean, floured counter top until smooth and elastic (Maybe ten minutes? The more bread you've made, the easier it will be for you to gauge things like this by grabbing the dough ball).  Return dough to mixing bowl and score the top to relieve surface tension.  Cover with a clean, damp dish towel and let rise for about an hour.  It should double in size.
  4. Punch down, knead gently, and roll into a log.  Separate it into four equal pieces.  Roll out each dough ball into a round about 8 " in diameter.  You may have to flour your counter top.  Mine seems to be magical in this regard, perhaps to make up for the annoying color pattern (I can never tell when the damn thing is clean.  Or dirty.  It's maddening.)  Cover the rounds with a dish towel and let rest 10 minutes.
  5. Before you punch your doughball, preheat the oven to 450F.  Stick a cookie sheet in there to get warm.  When the rounds are ready, put one or two on a sheet (the book says one at a time, but two fit on my sheets, and I had four hungry people waiting for dinner.  One of those four was me, so I wasted no time putting food on the table) and bake 2-3 minutes, until the top and edges are slightly golden and a pocket of air has formed.  Once that pocket forms, try not to let them cook more than another minute, but that may not be as critical if you don't plan to consume all of the bread in the next hour or so)
The breads can be kept wrapped in a fridge 2-3 days, or in a freezer 1-2 months.  Allow half an hour to thaw.  Pop them in a microwave or hot oven to re-warm.

Thursday, October 23, 2014

Screw Starbucks

I know everybody gets all meth-addict crazy when the pumpkin spice lattes are in season again.  A few weeks ago, I discovered it is now a hashtag (#PSL, because why would you bother with all those other letters?).  My opinion?  If you're slurping your pumpkin pie through a plastic lid, and saturating it with caffeine, you have a problem.  Whether it's with caffeine or with pumpkin, I couldn't guess, but if it's with pumpkin, there are plenty of other options.

I made my first pumpkin pie when I lived in Oregon.  Because I'm a great big nerd, I wanted to make it with real pumpkin.  Because I'm a great big idiot, I had no idea how much real pumpkin was needed for a single pie, and after I had rendered the enormous gourd I'd purchased into goop, my freezer was full of bright orange slurm.  I did the only reasonable thing and started looking for pumpkin recipes.  I also made a lot of pies that winter.

Whenever I have an oddball ingredient I want to exhaust, I tend to first look in my chocolate chip cookie compendium, because you really can't go wrong with more cookies.  More to the point, the index is well organized, so I can search for a specific ingredient, and then find the recipe.  You'd be surprised how poorly-organized the indices are in many of my cookbooks.  It's very disappointing.


Spicy Pumpkin Chocolate Chip Cookies
2 C flour
4 t baking powder
1 T cinnamon
1/2 t nutmeg
1/4 t ginger (I usually heap the spoon so high that it's closer to 1/2 t.  Suit yourself)
1 t salt
1/2 C shortening
1 C sugar
2 large eggs, beaten
1 C pumpkin puree (make it yourself or buy a can and portion it out, but don't buy pumpkin pie filling--that's different)
1 C chocolate chips
(I've also added 1 C chopped pecans, because I know some people who don't consider a pumpkin pie proper unless it's a praline pumpkin pie)

  1. Oven to 350F, Mr. Sulu!
  2. Cream the shortening and sugar.  Beat in the eggs and pumpkin.  Blend in the dry ingredients.  Add the chips. (aren't cookies easy??)
  3. Drop by teaspoonfuls onto greased (or parchment-lined) sheets (as a test, because this precaution is not always necessary, I tried it without the parchment paper this time.  I still got cookies instead of a goddamned mess, but the bottoms were a little rough once I got them off the sheet.  Use the parchment paper, but if you're ready to go into the oven and just discovered you're out--as I sometimes do--don't fret.).  Bake for about 15 minutes.
  4. Devour.

This is why I should have used parchment paper.  My experimental loss is your gain!
One final note: if your goal is pretty-looking cookies, these should be stored between layers of wax paper.  If your typical audience tends to just cram cookies in their faces rather than take pictures like some sort of food nerd, then don't waste the wax paper.

Thursday, October 9, 2014

A Seedy Joint

I picked up a couple pie pumpkins yesterday, and ended up chatting with the Whole Paycheck cashier for a little bit about gourd-based foods.  I told her how I roast and puree pumpkin (then freeze it in doses) to make pies, and she told me about some sort of dessert involving pumpkin seeds and milk.  I'm still not clear on how to make it, but she at least inspired me to try roasting pumpkin seeds again.

A couple notes:

First, I know all of you food-porn fans will be disappointed, but no pictures this time.  Partly because they're just seeds, after all, and partly because I'm still not sure I'm getting this right.

Second, despite first cooling the oven from 400 to 325 (because I just roasted the pumpkin, remember? For PIE), it took me a lot longer than the recipe suggested to get these cooked.  The last time I roasted pumpkin seeds, I still lived in Oregon, and followed the recipe exactly, and ended up feeling like I was chewing wood chips.  From testing along the way this time, I learned that it was not because I overcooked them, as the friendly cashier had suggested, but because I hadn't cooked them long enough.

Third, instead of drizzling the seeds with half a teaspoon of olive oil, I put all my rinsed seeds in a bowl and tossed them with maybe two teaspoons of olive oil and a generous does of kosher salt (because I don't have "fine sea salt," and I think three kinds of salt in one kitchen is already a little silly. Seriously.  I have a very small kitchen.).

The end result is much better than the last time I made them, but I'm still not entirely sold.  Maybe I'll get it right next year.

Thursday, October 2, 2014

Nuts. ...and berries

Many years ago, when the Chief Taster brought her brother to Oregon for a visit, we were gathered in my kitchen one afternoon between our morning trip to the lava caves and an afternoon hike up Pilot Butte.  I was getting some pizza dough ready for dinner, and they were perusing their snacking options.  He opened a container of granola and started munching a handful, then asked where I got it.  "I made it."  "Seriously??  Dude, do you buy any food?"  "...I bought this flour.  Does that count?"

I had started making granola few months earlier.  I tried a couple recipes, and found one that I definitely didn't like.  The other one was close, and I adjusted it a couple times until I had it where I liked it.  Years later, I changed it again, and I think I'm finally closing in on a really good formula.  This is the current iteration.

Ryan's Crunchy Granola (v.3)
4 C oats
1/2 C chopped almonds
1/2 C coarse chopped pecans
1/2 C dried cherries
1/2 C dried cranberries
1/2 t cinnamon
1/4 t salt
1/3 C oil
1/3 C honey
1/2 C brown sugar

  • Combine the first five ingredients in a large bowl.  Mix it up with your hands; it's more fun that way.
  • Combine remaining ingredients in a small saucepan over med-low heat.  Bring to a boil, stirring occasionally, then stir into the oat mixture.  Turn off the stove, too.
  • Mix well to coat the oat mixture thoroughly, then spread on a baking sheet (you may need two, but I usually manage with one these days.) and bake at 375F for half an hour, removing from oven to stir every 8-10 minutes.  Your baking time may vary; get it nicely browned, but not burnt.  Some of the dried fruit may swell a bit.  That's fine, too.
The above recipe is just a starting point.  If I've been making it over and over for a while (as I did in Oregon), I'll change things a little, but usually sticking with a cup of nuts and a cup of fruit, but I personally don't like walnuts in this recipe, even though I often put them in cookies and other food.  Do what you want.

Thursday, September 18, 2014

gooey chewy fruit madness

Last year, the day after I clawed my way out of the Pit of Despair which still held the Chief Taster in its slavering maw, I discovered that I finally felt well enough to go to the Cookie Exchange that evening.

Ever been to a cookie exchange?  The name should tell you everything you need, but I'm going to lay it out anyway, because it is magical.  Remember the old days, when people would try to impress other people with their culinary skill and baking mastery by single-handedly making and delivering several dozen different kinds of cookies to every person they knew?  It's the edible version of the annual Christmas letter.  Look how great I am!  I made thirty different kinds of cookies in just under two weeks, and here's your share!  some of them might still be fresh!  Enjoy reveling in my awesomeness!  WHOOOOOOsnorecollapse.

Then the Interwebs happened, and people learned to crowdsource holiday baking, giving rise to the noble Cookie Exchange.  You make one kind of cookie.  Two, if you feel ambitious.  Then you take your cookies to someone's house, which in my case was packed full of strangers, four people I knew, and a dog which ignored me when the children began to arrive.  Everyone puts their cookies on a great big table, and when you're ready to leave, you take a few cookies from each of the piles, and you get to have all the tasty variety of baking lots of different cookies after only making one or two recipes.  Brilliant!  Plus, if the people you invite to your exchange are the ones you would've given all those plates of cookies to anyway, you've not only shared your baked bounty with them, you've tricked them into baking part of it!!

The Chief Taster, as I mentioned, was still coughing and sneezing, and thus opted to stay away from other people's food, but I went with another friend, and learned the real secret of cookie exchanges: stay until the end.  Most people left early, and felt bad taking too much, so by the time there were only six or eight of us left, the table was still groaning under the baked burden.  I had to borrow an extra container to take my share of what was left.  On the other hand, the hosts had already learned the other lesson of cookie exchanges: be careful with the invitations.  They mentioned one person who had come the previous year and took all of a couple varieties of cookies, thereby completely missing the point of the exchange, and absconding with far more than they had provided.  They weren't invited to the exchange I attended.

I took one of my all-time favorite cookies.  The Chief Taster told me what she wanted to take (even though we both knew she wasn't going), but the invitation had specified that we were to bring four dozen cookies, and her recipe had a yield of 16 bars.  I didn't want to make three batches of them, so I made one, and didn't take them to the exchange.  That meant we got all the bars, which wasn't a bad idea.

Brandied Cranberry-Apricot Bars (From a very old Better Homes and Gardens cookbook)
2/3 C golden and/or dark raisins
1/3 C dried cranberries
1/3 C snipped dried apricots
1/3 C brandy or water
1 1/3 C all-purpose flour
1 1/3 C packed brown sugar
1/3 C butter
2 eggs
1 t vanilla
1/3 C chopped pecans
powdered sugar

you need this much fruit

  • Combine fruit and brandy in a saucepan.  Bring to a boil, then remove from heat and let stand 20 minutes before draining.
  • In a medium bowl, mix 1 C flour and 1/3 C brown sugar.  Use a pastry blender to cut in butter until mixture looks like coarse crumbs.  Press mixtures into an 8x8 baking dish, then bake at 350F for 20 minutes or until golden.
  • While the bottom crust bakes, make the filling.  Beat the eggs in a medium bowl.  The book told me to use an electric mixer on low speed for four minutes, but I used a whisk or a fork, because I really only use the electric mixer for whipped cream and waffle batter.  Add remaining flour and brown sugar, and the vanilla, stirring well.  Stir in the fruit and nuts.  Pour over hot crust, spreading evenly.
Real fruit filling!
  • Bake 40 minutes or until it passes the toothpick test.  (you can cover with foil for the last 10 minutes to prevent over-browning, but that wasn't a problem for me)  Cool on wire rack, dust with powdered sugar, cut into bars.

This is what mine looked like, after baking but before the powdered sugar.
These are really tasty bars, and on a few morning I had them for breakfast, but the really astounding part is how long they lasted.  I baked them a  few days before Christmas, we took them with us to Ohio, the Chief Taster brought some of them back from Ohio, and they were still waiting for me when I returned in the second half of January.  I had a bar tat night, and they were still good.  Keep them sealed, and keep them away from me, because although they survived a solid month with the Chief Taster--who had specifically requested them--they were gone within a couple days of my return.

Thursday, September 4, 2014

Pear Ginger Cookies

When I was in college and newspapers were still a thing, my college had a deal where certain newspapers magically appeared in the dorms each morning, and we could get them for free.  I wasn't very good about keeping up on all the current local and global events, but I was much better about doing the crossword and reading the comics.  I had enough on my plate without getting into politics and foreign policy.  I needed diversion, not news.

After college, I never got newspapers on a regular basis, and started reading more webcomics.  A couple years ago, one of them mentioned pear-ginger cookies, but the artist admitted that she didn't even know if that was a real thing.  Silly cartoonist.  Everything is on the internet.  I found a recipe I liked within minutes, and tried it a couple days later.


I might be in love with the recipe.  I have a book full of chocolate chip cookie recipes, and I can't argue with a classic like that; I have deep historical emotional ties to snickerdoodles and gingersnaps; but these cookies are soft and chewy and flavorful, and packed with lots of different textures and tastes.  Topped with the lemon icing, they're even better.


Thursday, August 28, 2014

It's in the bag... el

Many years ago, I adopted a cookbook that technically belonged to my brother. A friend of his had bought it for him, and it focused on bread. I dedicated myself to learning how to make good bread, and tried the very first (simplest, easiest) recipe several times before I was finally happy with the dough. The bread itself never did turn out the way I'd hoped, but I later learned that was more because of the oven I was using (real bakeries use stone or brick ovens baking at much higher temperatures than the one in most people's kitchens, and that does a lot to provide the hard, crusty exterior I'd wanted). At some point, my brother reclaimed his book, but Dad bought me my own copy for Christmas.  Maybe he knew how much I enjoyed making the bread; maybe he was just taking advantage of the fact that I lived with him at the time, and he enjoyed the results of my efforts.  Could go either way.

I was particularly excited to find a recipe for bagels in the book. It was one of those things I'd never considered before: I never knew anyone who made them, but it made sense that you could, because where else would they come from? Glorious bagel trees? Because I would move to that orchard today. In the years since, they have become one of my signature items. My bagels are a little ugly, but they are big, and toast wonderfully. A friend in Colorado will freeze my bagels for weeks to savor them. My aunt once marveled, "Even your mom never made bagels," thus providing some of the highest culinary praise I've ever received. I've made them so often that I have the recipe memorized, and baked batches in my mind while laying awake in my tent along the Appalachian Trail.

Here's what the Brothers Einstein don't want you to know: it's really easy to make bagels. What's hard is not eating an entire batch straight out of the oven. Below is the recipe from my first bread book, with only a couple small adjustments from my own experience.

Bagels
2 t dry yeast
1 1/2 T sugar
1 1/4 C warm water
3 3/4 C flour
1 1/2 t salt
egg (for egg wash)
1/2 t salt
toppings (sesame seeds, poppy seeds, and coarse sea salt are popular choices)

  1. Sprinkle yeast and sugar into 1/2 C of the water. Let stand 5 minutes, stir to dissolve.
  2. While the yeast is standing in the water, combine flour and salt in a large bowl, then use the spoon to make a "well" in the center.
  3. Pour the dissolved yeast and about half the remaining water into the well.  Stir in flour from the sides of the well, and add more water, as necessary, to make a firm, moist dough. I've found that I have to give up on the spoon at some point and start kneading before all the flour is drawn in to the dough. Otherwise, you'll be tempted to add more water than you need to get all the flour involved, but trust me--the dough ball in the mixing bowl is wetter than it looks, and you'll be able to work in plenty more flour while kneading.
  4. Knead the dough for about ten minutes, working in the remaining flour if necessary. You can add more flour at this point to get the dough very firm.
  5. Put the dough in a clean bowl and cover with a dish towel. Let it rise until doubled, about an hour. Punch down, and let it rest for ten minutes.
  6. Separate the dough into eight equal pieces. Gently roll each one between your palms to get a round ball, then (this is the fun part) pinch the center of the ball between your thumb and  forefinger until they meet, and tear a little hole there.  Stick a finger from each hand through the hole and twirl them a little to widen the hole. Repeat with the remaining seven dough balls, and set them on a parchment paper-lined baking sheet to rest for ten minutes.
  7. While the proto-bagels are resting, set your oven to 425F and let it preheat. Then put about two inches of water in a pan and get it boiling. If you want to top your bagels, make an egg wash by cracking an egg into a teacup, adding a little salt, and beating it with a fork.
  8. Turn the water down to a simmer and drop bagels into it one or two at a time (depending on the size of your pot). Cook each bagel for a minute, flipping them halfway through. My pot can boil two bagels at a time, and when I remove each pair back to the parchment-lined baking sheet, I brush them with egg wash and sprinkle them with seeds or sea salt while the next pair boils. I count to thirty a lot while making bagels, which makes it very difficult for me to have a conversation with anyone during this step.
  9. When your bagels have been boiled, brushed, and seeded, pop them in the oven for 20-25 minutes. I usually forget how long they've been in there (this never happens with most things I bake, which is weird), but I can always tell when they're done by the lovely golden-brown color of the tops. Remove to wire rack to cool.
Boiling the bagels is an important step. Do not skip it. Boiling is what gives bagels that shiny, chewy outside and the tender inside. Without boiling, these are just rolls with holes.
These are not standard bagels. These are from an experimental batch of pumpkin bagels.

Thursday, August 21, 2014

fajita filling

Sometime last winter, a coworker emailed this carnitas recipe to the Chief Taster.  The Chief Taster, knowing who makes the bread she butters, sent it to me.  We shared the wholly untested recipe with friends that weekend as fajita filling.  I was quick to remind them that I'd never made it before, in case it was terrible, but it's pretty hard to get a slow-cooker recipe so wrong as to render it inedible.
The spice blend
In fact, it was pretty good.  Not outstanding, in my mind, but everyone seemed to like it, and I tend to prefer flavors that grab you by the ears and shake you, demanding your attention.


Thursday, August 7, 2014

'Chess Pie

When Mom used to make Chocolate Chess Pie, I was always puzzled by the name.  I asked her once why it was called Chess Pie, because it was all one color, not a checkered pattern (I was pretty young when I asked.  Cut me some slack).  She told me that it was something baked by settlers, and they didn't always have fruit to put in the pies, so they made this out of relatively common ingredients that everyone had handy.  When asked what kind of pie it was, they'd respond, "oh, it's 'chess pie."

I'm pretty sure she made that up, but who cares?  It's delicious.

1.25 C sugar
1/4 C cocoa
1/4 C melted butter
2 eggs
10 T (5 oz) evaporated milk
1.5 t vanilla
1/8 t salt
5 oz evaporated milk.  Who wants to measure that 1 Tablespoon at a time??
Combine first three ingredients in medium bowl.  Add eggs, beat well.  Blend in last three ingredients.  Pour into unbaked pie shell, and bake at 350F 35-45 minutes.  Serve with whipped cream, ice cream, or coffee.  Hell, serve it with cognac.  Trust me--people dig this pie.  It doesn't really matter what else is on the table.  I served it on the same night we celebrated the Chief Taster's last school loan payment, and I think she liked it even more than the far more complex fish stew.


Thursday, July 24, 2014

Pumpkin Pretzels

During my difficulties last fall with measuring pumpkins, I ended up with 2/3 C puree leftover and thawed, and in urgent need of use.  The last time something like that happened, I made some experimental pumpkin bagels, which were ok, but not extraordinary.  I was going to do that again, mainly because I wanted bagels, when I decided to make pretzels instead.

How those monks thought this looked like children's hands praying, I'll never know.  I suspect some of that famous German beer was involved.
I'd made pretzels before.  Mine puff up an awful lot, so you really get pretzel-shaped sandwich buns, but... how is that a problem?

But there was still a problem.

I've made it clear that I'm not a pro, and I'm not an expert.  That's the whole point.  My aim is not to impress people with what I can do, but impress upon them what they can do.  That's why I'm willing to share some failures here, as well.

Not that these pretzels were a failure, mind you--they were damn tasty pretzels.  You just couldn't tell they had any pumpkin in them, and if you can't tell it happened, then why do it?

Since this formula is not worth replicating, I'm not posting how I did it here, but I'll still show you the pictures, and I promise that sometime--maybe before this post goes live during my hike--I'll make pretzels again, and post that recipe instead.

Pass the mustard and get out of my way.

Thursday, July 10, 2014

The right way to make sour cream cookies

The Chief Taster (and one of her co-workers) make fun of me for the notes I left myself in my chocolate chip cookie compendium.  Generally they are either remarks on the quality of results, or process notes.  Page 80, Mocha Dreams, has both: "12-14-12 use hand to mix. very good."  I also like to write the date of when I first made them, so I can track whether it's something I've already posted, in case I do something silly, like start a food blog.

They both got a kick out of page 44, Big-Batch Cookies, whose recipe recommends greasing the cookie sheets.  ("no need to grease my sheets"), but my personal favorite margin comment is on page 73, Honey Chocolate Chip Cookies ("These cookies make me sad.").

Page 77 ("Bad") was a finalist in the cookie competition which spawned the book, but I prefer the other sour cream recipe, found on page 78 ("GREAT!").  In fact, I originally started leaving myself notes in this book specifically to make sure that when I made sour cream chocolate chip cookies, I always used the second recipe, not the one which the judges found to be superior.  Perhaps they got to these entries after the section which involved alcohol-based cookie recipes?

Tricia's Sour Cream Chocolate Chip Cookies
2-2.5 C flour
1 t baking powder
1/2 t baking soda
dash of salt
3/4 C plus 2 T sugar
1/2 C butter, melted
1 egg
1/2 C sour cream
1 t vanilla (do you still measure vanilla?  I can't remember the last time I did.  I just like to dump it in until I feel happy)
2 C chocolate chips

  1. Preheat oven to 375F
  2. Cream sugar and butter in large bowl.  (Cream is a verb here--be aware)  Add egg, mix well.  Add sour cream, stirring to remove any lumps.  This should be very homogeneous.  Add vanilla.  Add 1 C flour with the baking powder, baking soda, and salt.  Add remaining flour gradually, "until semi-firm but smooth consistency is obtained."  If you've made chocolate chip cookies before, you'll have  a good idea of what you want, but if this is new for you, you'll have to wing it.  You don't want the dough too thick and dry, but you don't want it runny and wet, either.  Unlike many cookie recipes, this dough won't easily form cohesive balls--it's a little too sticky for that.  But you can spoon it out to make the cookies.  If you're not sure if you have enough, you can try baking a few, and add more flour later.  It's just easiest to get it mixed well before the chips are added.
  3. Add the chocolate chips.  Mix well.
  4. Drop by teaspoonfuls onto cookie sheet (this is another recipe that recommends greasing the sheets--I recommend parchment paper.  Do what you will.).  Bake 12-15 minutes.  Keep in mind that these cookies won't brown like most chocolate chip cookies.  They just get a little golden tan at the base and edges.  Don't leave them in too long.

The resulting cookies are very soft; someone once described them as "so fluffy!" but her mouth was full of cookie at the time, so maybe she actually said something else.  Sofa Fleas?  Maybe, but that didn't fit the context.

Thursday, June 26, 2014

Just something I cobbled together

Last summer, when Dad and The Lady came to visit, they brought with them a delicious bounty: a shoebox full of peaches.  We ate them every morning for breakfast, but we weren't sure we'd finish them before they got too mushy.  Something had to be done!

Cobbler had to be done.

Fresh Peach Cobbler
1/2 C sugar
1 T cornstarch
1/4 t cinnamon
4 C peeled, sliced peaches
1 t lemon juice
1 C all-purpose flour
1 T sugar
1 1/2 t baking powder
1/2 t salt
1 t firm butter
1/2 C milk
2 T sugar

  1. Heat oven to 400F
  2. Mix 1/2 C sugar, cornstarch, and cinnamon in 2 qt saucepan.  Stir in peaches and lemon juice.cook over medium-high heat 4-5 minutes, stirring constantly, until it's thick and boils.  Boil and stir 1 minute.  Pour into ungreased 2 qt casserole.  Keep it hot in the oven.
  3. Combine flour, 1 T sugar, baking powder, and salt in medium bowl.  Cut in butter with a pastry blender until it looks like fine crumbs.  Stir in milk.  Drop by spoonfuls over hot peaches.  (I worked with the peaches and dough simultaneously, so the peaches didn't rest in the oven.  Still worked.)  Sprinkle 2 T sugar over dough.
  4. bake 25-30 minutes or until topping is golden brown.  Serve with whipped cream, or iced cream, or brandy, or something.

Thursday, June 12, 2014

something's fishy

Last year, when the Chief Taster finished paying off her school loans and declared herself free, I made her a celebratory dinner.  Popovers (possibly her favorite form of bread), chocolate chess pie (which I grew up eating, and she had never met before, but instantly loved), and this Hearty Seafood Stew.  I was very pleased with myself, and she made lots of happy noises as she shoveled her way into the bowl, so I think it went well.


I cheat a little when I deal with shrimp; you can usually find peeled, deveined shrimp at the grocery (I get mine from the freezer case near the fish).  I still get the raw shrimp, but I save myself a lot of work because... I don't yet know how to peel and devein the little sea bugs in an efficient manner.  I need to work on that.

Thursday, May 29, 2014

The whole enchilada

Yeah, I said it.

When I lived in Oregon, we had a COO who owned a share of a beef ranch and liked to go elk hunting.  Both of those are more popular than you might think, because Oregon is like that (he also was part owner in a well-known and high-end goat cheese dairy, but that doesn't fit with this story).  Each year, usually late in the fall, was my favorite holiday: Elk Day.  That's when the COO would show up at our office, and fill any coolers we had with elk chops, deer chops, elk round steak, deer round steak, ground elk, ground venison, and ground beef.  I lived alone, so I could make my supply last until the next elk day.  The last of my treasured elk was marinated on a camping trip; the last of the venison was an inauguration day meal.  I tell you all of this only to explain the joke: the first time I made enchiladas, they were elkchiladas, and they were fantastic.

Now I settle for beef, but last summer I decided I had made them enough to start experimenting, and devised the following Chicken Spinach Enchiladas.  Enjoy!

1 lb boneless, skinless chicken thighs, cooked and shredded
10 oz package frozen spinach, cooked and drained
1/2 C chopped onion
1/2 C sour cream
1 C shredded cheddar
2 T chopped fresh parsley*
1/4 t black pepper
1/3 C chopped bell pepper
2/3 C water
1 T chili powder
1 1/2 t chopped fresh oregano*
1/4 t cumin
1x 4.5 oz can chopped green chiles, drained
1 clove garlic, finely minced
15 oz can tomato sauce
8-12 tortillas (5-6")
shredded cheese, sour cream, chopped onions, or any other toppings you like

disclaimer: the original recipe I used as a starting point called for corn tortillas. I only used those once, and they pissed me off.  If you try to roll them around the filling, they break apart.  If you soak them in sauce to make them pliable, they shred apart.  They are horrible.  However, I once got into a heated argument with someone on Facebook over corn vs. flour tortillas, and it quickly became obvious that neither of us would ever back down from the position of "You're an insane moron with crazy, stupid opinions, and also wrong," so I just de-friended them and had a beer.  You can use whatever you want, as long as it's flour.  Because corn tortillas are horrible.  However, after the first draft of this post, I heard from someone else that if you fry the corn tortillas in oil, it makes them pliable without making them disintegrate.  I haven't tried it yet.
  • Combine cooked, shredded chicken with onion, sour cream, 1 C cheese, parsley, cooked spinach, and black pepper.
  • In 2 qt saucepan, combine bell pepper, water, chili powder, oregano, cumin, green chiles, garlic and tomato sauce.  Bring to a boil, stirring occasionally, then reduce heat.  Simmer uncovered 5 minutes.
  • Spoon a little sauce into the bottom of an 11x7 baking dish (or whatever nearby size you have handy) and spread it around to cover the bottom surface of the pan (I usually achieve this by gently shaking it side-to-side).
  • Did you pre-heat the oven?  You should do that now.  350F.
  • Spoon about 1/3 cup of filling into a tortilla, roll it shut, and place seam side down in the baking dish.  Repeat until you run out of filling.
  • Pour remaining sauce over enchiladas.  Bake uncovered about 20 minutes, or until bubbly, and the tortillas crisp a little.  Top however you like (namely, cheese and sour cream).


*PROTIP: when using fresh herbs, you need about three times as much as you would dried herbs.  There are three teaspoons (t) in a tablespoon (T), so if you are like me and pretty much never have fresh parsley laying around, and can't see the reason in buying a big package when you only need a little bit, de-capitalize the T and used dried instead.  (or, if it calls for some amount of fresh herbs in teaspoons, just divide by three.)

Thursday, May 15, 2014

Strawberry rhubarb coffee cake

We visited the Chief Taster's parents earlier last spring, while rhubarb was in season.  Her dad, who once infamously snitched the last two pieces of Thanksgiving pie while nobody was looking, had some rhubarb cut fresh from his garden (which is vast).  While I was in another room, I overheard him tell everyone else, "I have some rhubarb and fresh strawberries, so if Ryan wanted to, he could make me a pie!"  I almost laughed hard enough to spray my toothpaste out of my nose.  I told him such a feat was possible, but we would need a recipe.  The Chief Taster's mom (who missed out on pumpkin pie the previous Thanksgiving when someone filched the last piece she had saved) threw herself into the task, but we got distracted by the allure of strawberry rhubarb coffee cake (scroll down for the variation recipe).  I volunteered to make it for breakfast the next day.

fruit and sugar, bubbling away on the stove.
My only real mistake was not spending more time familiarizing myself with the recipe and hidden location of kitchen items the night before; breakfast was a little later than we wanted.  Plus, some idiot had to keep stopping his work to take silly pictures.

Batter, then fruit goo, then the rest of the batter.  The last bit of batter won't spread well over the fruit goo, so try to glop it out evenly, because it's not going anywhere.
Eventually, we got to eat breakfast.  It was pretty good.  The Chief Taster's dad even served himself a second piece before finishing his first helping.  I take that as a good sign.


Thursday, May 1, 2014

morels, please!

Last year we went hiking on Mother's Day.  You may recall there were bears.  There were also morel mushrooms.  When I was a kid, my parents discovered morels and got really excited about hunting them.  For a while, there was a pretty reliable patch in our back yard, and a couple others within a ten minute walk from our house.  Admittedly, I was never that excited about them back then, but it had been over a decade since I'd had any, so I was excited to try them again.

If you go out mushroom hunting, the first thing you should do is make sure you don't pick something poisonous that just looks like morels.  If you don't know, don't eat them.  I'm not telling you how to tell the difference--find someone who's willing to take that responsibility with your life, and ask them.

Second, the forest and park services advise using a mesh bag to carry your haul so the spores can stay in the forest.

When you get your mushrooms home, clean them and soak them in salt water.  This will help drive out any bugs that might have been living inside and didn't fall out of your mesh bag.  Then, slice them lengthwise and do what you will.


On the night I cooked mine, I had also happened to cook some sausage, so I just threw the mushrooms in the pan of sausage juices and sauteed them.


Butter will also work, obviously.  There are plenty of sites that are full of recipes and suggestions.  They probably also have better presentation on the plate than I do.

They taste better than they look.  Honest!
Ii was happy to get to try them again, but I was a little disappointed once I did.  Generally speaking, I love mushrooms.  I put them in salads, pasta sauce, lasagna, pizza, whatever.  But since I had cooked these in sausage drippings, they just tasted like sausage.  None of the original mushroom flavor survived the onslaught of seasoned meat.  Oops.  But they were still very good.  The Chief Taster, however, was wary of them, despite being excited about picking them, and refused to try more than a bite.  Good thing I didn't put them on the pizza I made that night, or I would have had to eat the whole thing myself.  And wouldn't that have been sad?  (for her.)

I make an outstanding pie.  My humble pie is not as good.

Thursday, April 17, 2014

El Pollo

Our grocery is usually a total madhouse at lunchtime, and again just after 5 on weekdays.  On weekends, if you don't get there first thing in the morning, it is often best to avoid it entirely.  I've gotten pretty good at finding all the things I use on a semi-regular basis, but being an adventurous sort in the kitchen means occasionally using new ingredients, which means spending a lot of time staring in aisles, trying to decode the complex and arcane methodology by which the local food mart "organizes" potables, a task regularly complicated by other people engaged in the exact same activity--or even worse, simply taking up space in the aisles while chatting with friends, poking at their phones, or staring fixedly at the bottom shelf while their cart sits abandoned twelve feet away.

I quickly reach a point where I grab jars that look right and hope for the best, which is how I ended up with whole artichoke hearts instead of those that were quartered, and didn't notice the mistake until I opened the can, and set about hacking at the vegetables with a knife, cursing my own inattention.

Spanish Chicken
1 3/4 lb boneless skinless chicken bits, cut into 1 inch pieces
1 lb turkey Italian sausage, cut into 1 inch pieces
1 1/2 C red bell pepper, chopped
1 C chopped onion
2 cloves garlic, finely chopped
1 t dried oregano
1/2 to 1 t crushed red pepper
1 can (28 oz) diced tomatoes, undrained
1 can (6 oz) tomato paste
1 can (14 oz) artichoke heart QUARTERS, drained
1 can (4 oz) sliced ripe olives, drained
3 C hot cooked rice (this can be made toward the end of cooking time.  It goes in bowls, not the pot)


  • Mix everything except artichoke hearts, olives and rice in slow cooker.
  • Cover and cook on Low 6-8 hours
  • Stir in artichoke hearts and olives; heat through.  Serve with rice.

 I also messed up and put the olives in early, but it doesn't matter.

Thursday, April 3, 2014

drinkable sandwich

Dad once found a recipe for Cream of Reuben Soup, which I may have mentioned in the past, but I never bothered to actually give you the recipe.  I like to leave 'em wanting more.

Cream of Reuben Soup
6 C chicken broth
3/4 lb cooked corned beef, chopped (you can use the deli meat if you can't get a real corned beef somewhere.  They're easier to find in March)
10 oz can, sauerkraut, drained
1 large carrot, peeled and grated
1/2 C chopped onion
1 garlic clove, minced
1/2 t dried thyme
1 Bay leaf (or two.  Two works.)
1/4 t ground white pepper (I've never found white pepper, so I just use black pepper.)
1/4 t tarragon
3 T cornstarch mixed with 1/3 C water
2 C (8oz) shredded Swiss
1 C heavy whipping cream
rye bread crumbs, toasted (go with rye croutons.  Chop the bread slices into squares, and toast them in batches on baking sheets in the oven.  Only toast enough to make a meal, because you want them crisp when they top the soup)

  • Combine ingredients above from broth to tarragon in large soup pot.  Bring to a boil over medium heat.  Reduce heat and simmer 30 minutes.  Remove bay leaf.
  • Combine corn starch and water, and stir smooth.  Stir into soup and bring to a boil, stirring constantly.  Cook and stir 1 minute.
  • Remove from heat.  Add cheese and cream.  Stir until cheese melts.
  • Top each serving with toasted rye cubes.

From the very first time Dad and I made this, it has remained one of my favorite recipes.  It's only fair that you have me over to try yours.

Thursday, March 20, 2014

long overdue cookies

When I mention I have a cookbook featuring 101 different chocolate chip cookie recipes, compiled from entries in a contest to find the best chocolate chip cookie, I am usually met with expressions of awe and naked greed.  Oddly enough, it wasn't until December 13 of last year (the birthday of a friend of ours) that I finally got around to making the Grand Prize Winner.

Prize-Winning Double Chocolate Chip Cookies

1 3/4 C flour
1/4 t baking soda
1 C butter, softened
1 t vanilla
1 C granulated sugar
1/2 C dark brown sugar, firmly packed
1 egg
1/3 C unsweetened cocoa
2 T milk
1 C chopped pecans or walnuts
1 C chocolate chips

  1. Preheat oven to 350F
  2. Cream the butter and sugars.  Add vanilla.  Beat in the egg.  Add the cocoa, then the milk.  Beat in flour and baking soda just until blended.  Stir in nuts and chocolate chips.
  3. Drop by rounded teaspoonfuls onto parchment paper lined cookie sheets.  Bake 12-13 minutes.  Allow to cool slightly on sheets before removing to counter or wire rack.

Thursday, March 13, 2014

It's what's stewed for dinner

This is one of the recipes the Chief Taster likes to use.  This time, when she suggested beef stew for dinner, I thought that meant I had the night off.  I was wrong.

Old-Fashioned Beef Stew (from an old Better Homes and Gardens cookbook)
2 T flour
12 oz beef stew meat, cut into 3/4" cubes (I have no idea how much beef I used, but I think it was closer to a pound)
2 T cooking oil
3 C vegetable juice
1 C water
1 medium onion, cut into thin wedges (I used about half an onion, because I think these older recipes referenced smaller vegetables)
1 T Worcestershire sauce
1 1/2 t beef bouillon granules
1 t dried oregano
1/2 t dried marjoram
1/4 t black pepper
1 bay leaf (I used my dad's rule of always adding an extra bay leaf. Nobody died.)
3 C cubed potatoes
1 1/2 C frozen cut green beans
1 C frozen whole kernel corn (instead of looking for these specific frozen vegetables, I used an equal amount of whatever frozen mixed veggies I had handy)
1 C sliced carrots


  • Put the flour in a plastic bag or a bowl with a tightly sealing lid.  Add meat cubes, a few at a time, tossing to coat and removing the coated cubes to a large saucepan or Dutch oven with the oil.  You may have to add a little more flour; I did.  Brown meat, drain if necessary, and add vegetable juice, water, onion, Worcestershire sauce, bouillon, bay leaf, and seasonings.  Bring to boiling, then reduce heat, cover, and simmer 1-1 1/2 hours, until meat is tender.
  • Add potatoes and veggies.  Return to boiling, then reduce heat, cover, and simmer another 30 minutes, until potatoes are done.  Discard bay leaf.  Eat.


Beef stew is meant to be a hearty meal, but for some reason, when I have a hearty meal, I want bread, too.  We didn't have any dinner bread at the time, and I didn't have the time to make any, nor the ambition for biscuits, so I took the easy way out and made some libum.  Libum is one of the oldest existing bread recipes, and my personal favorite for short-notice bread baking, but it's also a post for another time.  For now, suffice to say that if you make libum with gorgonzola cheese, you get green bread.

It's greener without the flash, but it's also too dark to tell it's green with just the overhead light in my kitchen.  Just trust me on this one.

Thursday, March 6, 2014

go bananas

When I unloaded the car from a recent "camping" trip, I discovered that the bananas which made it all the way home were in no fit state of banananess.  The backs of two of them were very soft from bruising, probably a result of fitting three adults and their collection of food and winter gear into my fierce but tiny car.  It's a wonder we didn't all have soft spots.  My revulsion at sinking into the fruit was short-lived; soft bananas means it's time for banana bread.

I used to use a recipe from Betty Crocker when I made banana bread, but it called for buttermilk, which I never have, and always substituted an equal amount of milk, curdled with the addition of 1-2 t lemon juice and half an hour of time.  Now I prefer the recipe from The Complete Family Cookbook, a tome Dad has in his kitchen, and which, after extensive searching, he found in a secondhand bookstore.  He got copies for my brother and I, and despite the age-yellowed pages (the only date I can find on it is 1969), my copy seems untouched.

Many years ago, before I moved to Oregon, I was talking to a  co-worker about my plans to make banana bread that night (still using BC's formula), and I mentioned that I wasn't sure I had chocolate chips.  He was appalled, certain that chocolate chips in banana bread would be a mistake.  I was equally appalled, as I knew from years of Mom's baking that chocolate chips belong in banana bread in the same way that cheese belongs in an omelet; it can be done without, but why would you bother?  My plan this time hinged on the bag of morsels I knew was on the bottom shelf of the fridge, but I was sidetracked by one of the variations suggested in the cookbook: prune nut banana bread.  Thing is, I'm not crazy about prunes, but I knew we had dried apricots, and I love those little buggers.  We also had pecans, but I toyed with the idea of going apricot-chocolate chip.

Prune Apricot Pecan Banana Bread
3/4 C sugar
1/2 C oil
2 eggs
1 C mashed bananas (wait until they're bruised badly or WAY too ripe--it makes for easier mashing)
1 3/4 C flour
2 t baking powder
1/2 t baking soda
1/2 t salt
1/2 C chopped pecans
1/2 C chopped dried apricots (coarser chopping means larger chewy chunks later.  Keep that in mind if you like larger chewy chunks, but don't just throw them in whole, because you still need to slice the bread, you animal)
Two bananas mash into one cup.  Your results may vary according to bananas.

  • Preheat oven to 325F.
  • Combine sugar, oil, and eggs in large bowl. Beat until frothy.  Add fruit and nuts, mix well.  Mix in dry ingredients.
Add apricots, pecans, and bananas; mix well.
  • Pour into greased 9" x 5" loaf pan.  Bake for 1 hour, until brown and a toothpick inserted in the middle comes out clean (As the loaf bakes and expands, it will develop a crack running along the middle of the top of the loaf.  If appearance concerns you, poke the toothpick in here, where it won't disturb the crust and leave a nice-looking loaf intact).  Let it cool ten minutes in the pan before removing to a wire rack.  You may need to run a butter knife around the loaf inside the pan to loosen it a little.

One administrative note: if you follow my other blog, you know that I'm going to spend a good chunk of this year backpacking.  Monday will be my first day on the trail.  Backpackers eat a lot of crap, and do very little actual cooking.  Most of the time it's a matter of boiling water and adding carbs.  If I get creative, I'll stir some peanut butter into my noodles for calories and protein, and pretend it's Thai food.  Suffice to say, most of you won't be interested in my food over the summer unless you already follow my other blog.  But fear not!  Knowing this day would come, I've been stockpiling lots of posts to get you through the summer, although we're switching from Weekly to Bi-weekly until I return from my trip.  I did get a little ahead of myself, though, so the bi-weekly schedule won't start for a couple weeks.  We still have to try beef stew and some cookies (no surprise there).  And I still might wedge in a couple food-related posts from the trail.  Check back often, or Follow this blog to get all the updates.

Happy Trails,
Ryan