summary

Cooking without a safety net

Thursday, October 2, 2014

Nuts. ...and berries

Many years ago, when the Chief Taster brought her brother to Oregon for a visit, we were gathered in my kitchen one afternoon between our morning trip to the lava caves and an afternoon hike up Pilot Butte.  I was getting some pizza dough ready for dinner, and they were perusing their snacking options.  He opened a container of granola and started munching a handful, then asked where I got it.  "I made it."  "Seriously??  Dude, do you buy any food?"  "...I bought this flour.  Does that count?"

I had started making granola few months earlier.  I tried a couple recipes, and found one that I definitely didn't like.  The other one was close, and I adjusted it a couple times until I had it where I liked it.  Years later, I changed it again, and I think I'm finally closing in on a really good formula.  This is the current iteration.

Ryan's Crunchy Granola (v.3)
4 C oats
1/2 C chopped almonds
1/2 C coarse chopped pecans
1/2 C dried cherries
1/2 C dried cranberries
1/2 t cinnamon
1/4 t salt
1/3 C oil
1/3 C honey
1/2 C brown sugar

  • Combine the first five ingredients in a large bowl.  Mix it up with your hands; it's more fun that way.
  • Combine remaining ingredients in a small saucepan over med-low heat.  Bring to a boil, stirring occasionally, then stir into the oat mixture.  Turn off the stove, too.
  • Mix well to coat the oat mixture thoroughly, then spread on a baking sheet (you may need two, but I usually manage with one these days.) and bake at 375F for half an hour, removing from oven to stir every 8-10 minutes.  Your baking time may vary; get it nicely browned, but not burnt.  Some of the dried fruit may swell a bit.  That's fine, too.
The above recipe is just a starting point.  If I've been making it over and over for a while (as I did in Oregon), I'll change things a little, but usually sticking with a cup of nuts and a cup of fruit, but I personally don't like walnuts in this recipe, even though I often put them in cookies and other food.  Do what you want.

Thursday, September 18, 2014

gooey chewy fruit madness

Last year, the day after I clawed my way out of the Pit of Despair which still held the Chief Taster in its slavering maw, I discovered that I finally felt well enough to go to the Cookie Exchange that evening.

Ever been to a cookie exchange?  The name should tell you everything you need, but I'm going to lay it out anyway, because it is magical.  Remember the old days, when people would try to impress other people with their culinary skill and baking mastery by single-handedly making and delivering several dozen different kinds of cookies to every person they knew?  It's the edible version of the annual Christmas letter.  Look how great I am!  I made thirty different kinds of cookies in just under two weeks, and here's your share!  some of them might still be fresh!  Enjoy reveling in my awesomeness!  WHOOOOOOsnorecollapse.

Then the Interwebs happened, and people learned to crowdsource holiday baking, giving rise to the noble Cookie Exchange.  You make one kind of cookie.  Two, if you feel ambitious.  Then you take your cookies to someone's house, which in my case was packed full of strangers, four people I knew, and a dog which ignored me when the children began to arrive.  Everyone puts their cookies on a great big table, and when you're ready to leave, you take a few cookies from each of the piles, and you get to have all the tasty variety of baking lots of different cookies after only making one or two recipes.  Brilliant!  Plus, if the people you invite to your exchange are the ones you would've given all those plates of cookies to anyway, you've not only shared your baked bounty with them, you've tricked them into baking part of it!!

The Chief Taster, as I mentioned, was still coughing and sneezing, and thus opted to stay away from other people's food, but I went with another friend, and learned the real secret of cookie exchanges: stay until the end.  Most people left early, and felt bad taking too much, so by the time there were only six or eight of us left, the table was still groaning under the baked burden.  I had to borrow an extra container to take my share of what was left.  On the other hand, the hosts had already learned the other lesson of cookie exchanges: be careful with the invitations.  They mentioned one person who had come the previous year and took all of a couple varieties of cookies, thereby completely missing the point of the exchange, and absconding with far more than they had provided.  They weren't invited to the exchange I attended.

I took one of my all-time favorite cookies.  The Chief Taster told me what she wanted to take (even though we both knew she wasn't going), but the invitation had specified that we were to bring four dozen cookies, and her recipe had a yield of 16 bars.  I didn't want to make three batches of them, so I made one, and didn't take them to the exchange.  That meant we got all the bars, which wasn't a bad idea.

Brandied Cranberry-Apricot Bars (From a very old Better Homes and Gardens cookbook)
2/3 C golden and/or dark raisins
1/3 C dried cranberries
1/3 C snipped dried apricots
1/3 C brandy or water
1 1/3 C all-purpose flour
1 1/3 C packed brown sugar
1/3 C butter
2 eggs
1 t vanilla
1/3 C chopped pecans
powdered sugar

you need this much fruit

  • Combine fruit and brandy in a saucepan.  Bring to a boil, then remove from heat and let stand 20 minutes before draining.
  • In a medium bowl, mix 1 C flour and 1/3 C brown sugar.  Use a pastry blender to cut in butter until mixture looks like coarse crumbs.  Press mixtures into an 8x8 baking dish, then bake at 350F for 20 minutes or until golden.
  • While the bottom crust bakes, make the filling.  Beat the eggs in a medium bowl.  The book told me to use an electric mixer on low speed for four minutes, but I used a whisk or a fork, because I really only use the electric mixer for whipped cream and waffle batter.  Add remaining flour and brown sugar, and the vanilla, stirring well.  Stir in the fruit and nuts.  Pour over hot crust, spreading evenly.
Real fruit filling!
  • Bake 40 minutes or until it passes the toothpick test.  (you can cover with foil for the last 10 minutes to prevent over-browning, but that wasn't a problem for me)  Cool on wire rack, dust with powdered sugar, cut into bars.

This is what mine looked like, after baking but before the powdered sugar.
These are really tasty bars, and on a few morning I had them for breakfast, but the really astounding part is how long they lasted.  I baked them a  few days before Christmas, we took them with us to Ohio, the Chief Taster brought some of them back from Ohio, and they were still waiting for me when I returned in the second half of January.  I had a bar tat night, and they were still good.  Keep them sealed, and keep them away from me, because although they survived a solid month with the Chief Taster--who had specifically requested them--they were gone within a couple days of my return.

Thursday, September 4, 2014

Pear Ginger Cookies

When I was in college and newspapers were still a thing, my college had a deal where certain newspapers magically appeared in the dorms each morning, and we could get them for free.  I wasn't very good about keeping up on all the current local and global events, but I was much better about doing the crossword and reading the comics.  I had enough on my plate without getting into politics and foreign policy.  I needed diversion, not news.

After college, I never got newspapers on a regular basis, and started reading more webcomics.  A couple years ago, one of them mentioned pear-ginger cookies, but the artist admitted that she didn't even know if that was a real thing.  Silly cartoonist.  Everything is on the internet.  I found a recipe I liked within minutes, and tried it a couple days later.


I might be in love with the recipe.  I have a book full of chocolate chip cookie recipes, and I can't argue with a classic like that; I have deep historical emotional ties to snickerdoodles and gingersnaps; but these cookies are soft and chewy and flavorful, and packed with lots of different textures and tastes.  Topped with the lemon icing, they're even better.


Thursday, August 28, 2014

It's in the bag... el

Many years ago, I adopted a cookbook that technically belonged to my brother. A friend of his had bought it for him, and it focused on bread. I dedicated myself to learning how to make good bread, and tried the very first (simplest, easiest) recipe several times before I was finally happy with the dough. The bread itself never did turn out the way I'd hoped, but I later learned that was more because of the oven I was using (real bakeries use stone or brick ovens baking at much higher temperatures than the one in most people's kitchens, and that does a lot to provide the hard, crusty exterior I'd wanted). At some point, my brother reclaimed his book, but Dad bought me my own copy for Christmas.  Maybe he knew how much I enjoyed making the bread; maybe he was just taking advantage of the fact that I lived with him at the time, and he enjoyed the results of my efforts.  Could go either way.

I was particularly excited to find a recipe for bagels in the book. It was one of those things I'd never considered before: I never knew anyone who made them, but it made sense that you could, because where else would they come from? Glorious bagel trees? Because I would move to that orchard today. In the years since, they have become one of my signature items. My bagels are a little ugly, but they are big, and toast wonderfully. A friend in Colorado will freeze my bagels for weeks to savor them. My aunt once marveled, "Even your mom never made bagels," thus providing some of the highest culinary praise I've ever received. I've made them so often that I have the recipe memorized, and baked batches in my mind while laying awake in my tent along the Appalachian Trail.

Here's what the Brothers Einstein don't want you to know: it's really easy to make bagels. What's hard is not eating an entire batch straight out of the oven. Below is the recipe from my first bread book, with only a couple small adjustments from my own experience.

Bagels
2 t dry yeast
1 1/2 T sugar
1 1/4 C warm water
3 3/4 C flour
1 1/2 t salt
egg (for egg wash)
1/2 t salt
toppings (sesame seeds, poppy seeds, and coarse sea salt are popular choices)

  1. Sprinkle yeast and sugar into 1/2 C of the water. Let stand 5 minutes, stir to dissolve.
  2. While the yeast is standing in the water, combine flour and salt in a large bowl, then use the spoon to make a "well" in the center.
  3. Pour the dissolved yeast and about half the remaining water into the well.  Stir in flour from the sides of the well, and add more water, as necessary, to make a firm, moist dough. I've found that I have to give up on the spoon at some point and start kneading before all the flour is drawn in to the dough. Otherwise, you'll be tempted to add more water than you need to get all the flour involved, but trust me--the dough ball in the mixing bowl is wetter than it looks, and you'll be able to work in plenty more flour while kneading.
  4. Knead the dough for about ten minutes, working in the remaining flour if necessary. You can add more flour at this point to get the dough very firm.
  5. Put the dough in a clean bowl and cover with a dish towel. Let it rise until doubled, about an hour. Punch down, and let it rest for ten minutes.
  6. Separate the dough into eight equal pieces. Gently roll each one between your palms to get a round ball, then (this is the fun part) pinch the center of the ball between your thumb and  forefinger until they meet, and tear a little hole there.  Stick a finger from each hand through the hole and twirl them a little to widen the hole. Repeat with the remaining seven dough balls, and set them on a parchment paper-lined baking sheet to rest for ten minutes.
  7. While the proto-bagels are resting, set your oven to 425F and let it preheat. Then put about two inches of water in a pan and get it boiling. If you want to top your bagels, make an egg wash by cracking an egg into a teacup, adding a little salt, and beating it with a fork.
  8. Turn the water down to a simmer and drop bagels into it one or two at a time (depending on the size of your pot). Cook each bagel for a minute, flipping them halfway through. My pot can boil two bagels at a time, and when I remove each pair back to the parchment-lined baking sheet, I brush them with egg wash and sprinkle them with seeds or sea salt while the next pair boils. I count to thirty a lot while making bagels, which makes it very difficult for me to have a conversation with anyone during this step.
  9. When your bagels have been boiled, brushed, and seeded, pop them in the oven for 20-25 minutes. I usually forget how long they've been in there (this never happens with most things I bake, which is weird), but I can always tell when they're done by the lovely golden-brown color of the tops. Remove to wire rack to cool.
Boiling the bagels is an important step. Do not skip it. Boiling is what gives bagels that shiny, chewy outside and the tender inside. Without boiling, these are just rolls with holes.
These are not standard bagels. These are from an experimental batch of pumpkin bagels.

Thursday, August 21, 2014

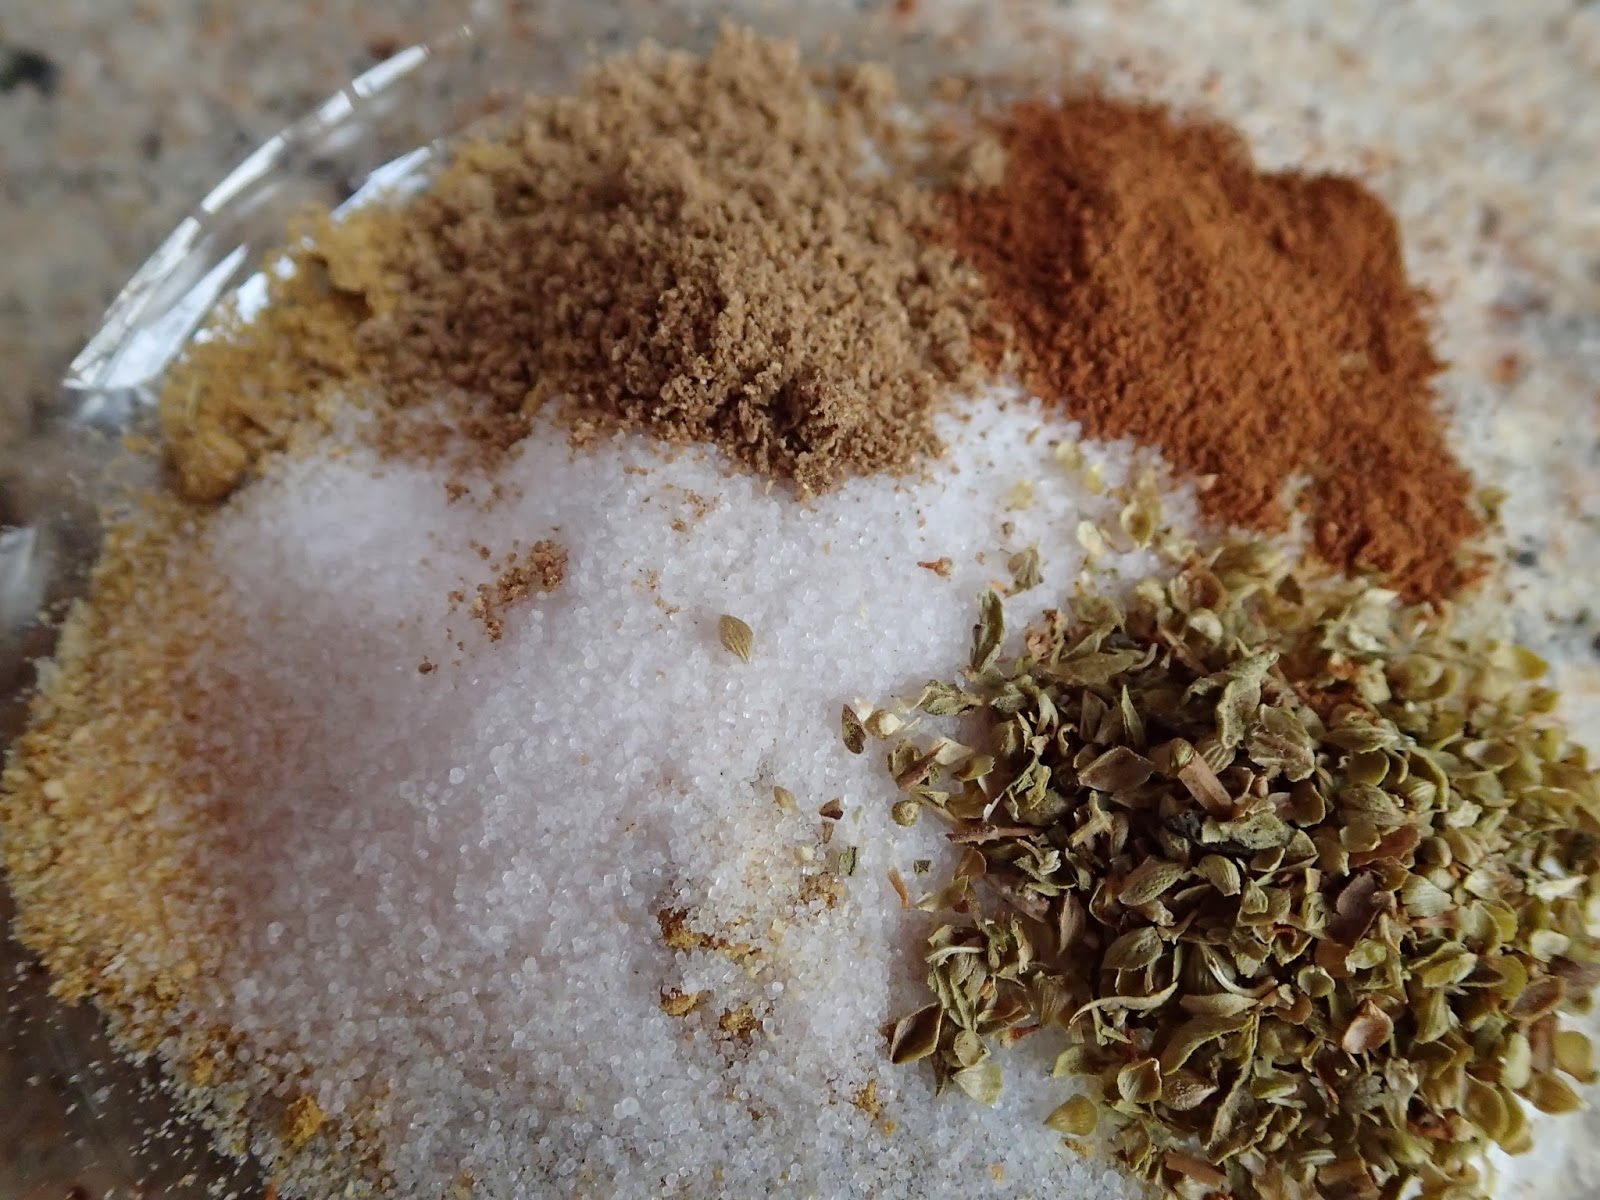
fajita filling

Sometime last winter, a coworker emailed this carnitas recipe to the Chief Taster.  The Chief Taster, knowing who makes the bread she butters, sent it to me.  We shared the wholly untested recipe with friends that weekend as fajita filling.  I was quick to remind them that I'd never made it before, in case it was terrible, but it's pretty hard to get a slow-cooker recipe so wrong as to render it inedible.
The spice blend
In fact, it was pretty good.  Not outstanding, in my mind, but everyone seemed to like it, and I tend to prefer flavors that grab you by the ears and shake you, demanding your attention.


Thursday, August 7, 2014

'Chess Pie

When Mom used to make Chocolate Chess Pie, I was always puzzled by the name.  I asked her once why it was called Chess Pie, because it was all one color, not a checkered pattern (I was pretty young when I asked.  Cut me some slack).  She told me that it was something baked by settlers, and they didn't always have fruit to put in the pies, so they made this out of relatively common ingredients that everyone had handy.  When asked what kind of pie it was, they'd respond, "oh, it's 'chess pie."

I'm pretty sure she made that up, but who cares?  It's delicious.

1.25 C sugar
1/4 C cocoa
1/4 C melted butter
2 eggs
10 T (5 oz) evaporated milk
1.5 t vanilla
1/8 t salt
5 oz evaporated milk.  Who wants to measure that 1 Tablespoon at a time??
Combine first three ingredients in medium bowl.  Add eggs, beat well.  Blend in last three ingredients.  Pour into unbaked pie shell, and bake at 350F 35-45 minutes.  Serve with whipped cream, ice cream, or coffee.  Hell, serve it with cognac.  Trust me--people dig this pie.  It doesn't really matter what else is on the table.  I served it on the same night we celebrated the Chief Taster's last school loan payment, and I think she liked it even more than the far more complex fish stew.


Thursday, July 24, 2014

Pumpkin Pretzels

During my difficulties last fall with measuring pumpkins, I ended up with 2/3 C puree leftover and thawed, and in urgent need of use.  The last time something like that happened, I made some experimental pumpkin bagels, which were ok, but not extraordinary.  I was going to do that again, mainly because I wanted bagels, when I decided to make pretzels instead.

How those monks thought this looked like children's hands praying, I'll never know.  I suspect some of that famous German beer was involved.
I'd made pretzels before.  Mine puff up an awful lot, so you really get pretzel-shaped sandwich buns, but... how is that a problem?

But there was still a problem.

I've made it clear that I'm not a pro, and I'm not an expert.  That's the whole point.  My aim is not to impress people with what I can do, but impress upon them what they can do.  That's why I'm willing to share some failures here, as well.

Not that these pretzels were a failure, mind you--they were damn tasty pretzels.  You just couldn't tell they had any pumpkin in them, and if you can't tell it happened, then why do it?

Since this formula is not worth replicating, I'm not posting how I did it here, but I'll still show you the pictures, and I promise that sometime--maybe before this post goes live during my hike--I'll make pretzels again, and post that recipe instead.

Pass the mustard and get out of my way.