summary

Cooking without a safety net

Thursday, February 6, 2014

A delicious way to spend an afternoon

A couple weeks before Thanksgiving, the Chief Taster drove us to the bookstore because she wanted to try more Mediterranean food, and thought we should get a Mediterranean cookbook.  I (correctly) took this to mean "I want you to cook me some Mediterranean food," but I was ok with that, because it sounded pretty good to me, too.

When I lived in Oregon, I had an Iranian friend who was in the same hiking group as me.  I guess I still have an Iranian friend, but I don't get to see her as often now.  One night, maybe a month or so before I left town, she had me over for dinner with a couple other mutual friends.  Her mom, a venerable woman who spoke slightly more English than I speak Iranian (I currently know one word--tahdeeg--and have forgotten everything else they taught me that night.), cooked an amazing meal of lamb stew and rice.  It remains the best Persian food I've ever had, and it sparked my interest in the cuisine of my friend's homeland.
my tahdeeg; not as good as my friend's mom's, but still tasty


We closely examined several books on Mediterranean food before finding one we liked.  If you'd like to try this dish or any other from the region, just go buy the book.  This post (and any others derived from Kehdy's recipes) won't do the material justice, and her pictures are prettier than mine.

Before leaving for work one day after we made our purchase, the Chief Taster requested Jeweled Rice for dinner with my brother's Honey Butter Glazed Salmon, a long-time favorite of hers.  I agreed, and luckily I started early, because it was much more time-consuming than I initially realized.

To be fair, if I had planned more than 12 hours in advance, it would have been easier.  When I agreed to her menu choice, I didn't know that this recipe would first require me to tackle three others.

Advieh
1 T ground pistachios
1/2 t ground dried edible rose petals (I didn't use these, because I couldn't find them)
1/2 t saffron threads (I chopped them into smaller pieces)
1 t ground cardamom
1 t ground cinnamon

Full disclosure: I only realized after returning from the store that my cardamom was not in ground form, so I had to grind it myself, just like the pistachios.  Naturally, we don't have a mortar and pestle, so I had to use a narrow jar and a small bowl, hoping the entire time that I wouldn't break either one and drive broken glass into my hand.  Mix everything together.  Store in an airtight container up to 3 months.

Saffron Liquid (makes 1 T)
Toast 10 saffron threads in heavy-bottomed pan over medium heat for 30 seconds, until fragrant, shaking pan often.  Transfer to a mortar and allow to cool 1 to 2 minutes before grinding to powder.  Mix ground saffron with 1 T boiling water and set aside to cool at least one hour, until rich orange hue appears.

Parboiled Rice
2 C basmati rice
3 T sea salt

  1. Wash the rice in five or six changes of water, until water runs clear.  Hopefully you have a colander or sieve that will work well for this, because I didn't, and had to try very hard to not spill rice from my bowl while dumping out the water.  It was a real pain to wash the rice my way.
  2. Pour 4 C warm water into a large bowl with 1 T salt.  Add rice and leave to soak no more than 30 minutes, running your fingers through every so often to loosen the grains.  Drain rice and rinse under warm water.
  3. Pour 5 1/2 C water into large saucepan with remaining salt.  Bring to a boil and stir in well-strained rice.  Return to a boil and cook over high heat, uncovered, just over three minutes, until grains are soft outside but still firm in the middle.  Do not stir rice again.
  4. Drain parboiled rice in a strainer and rinse with lukewarm water, tossing gently to remove excess moisture and separate the grains.  Parboiled rice can be stored in the fridge up to 3 days.  Return to room temperature before using in recipe.
Now the main event (a fair assessment, since this gorgeous side dish required far more effort than the entree):
Jeweled Rice
1/4 C dried currants
1 C dried barberries or cranberries
1 bitter orange, such as a Seville (I skipped this entirely)
3/4 C slivered almonds
1/2 C shelled pistachios, halved
1 T finely chopped mint leaves
5 T sunflower oil
1 recipe quantity Parboiled Rice
1 t Advieh
4 T unsalted butter
2 T Saffron Liquid
  • Soak the currants in water 10 minutes.  Soak cranberries in a separate bowl 5 minutes.  Drain both and pat dry separately.
  • (I skipped the orange, so I'm skipping transcription of the orange step.  If you want to get the recipe right, buy the book)
    This picture illustrates some of the pretty ingredients, and the third way I screwed up this recipe.
  • Reserve 1 T each of the slivered almonds, pistachios, and currants.  Combine the remainder of each with the mint.
The "jewels" of the jeweled rice.
  • Heat the oil in a heavy-bottomed saucepan over medium heat until sizzling.  Spoon 4-5 T of rice across bottom of pan to cover.  Sprinkle 1 T of fruit and nut mixture over rice, then sprinkle in a pinch of advieh.  Continue adding layers, building a dome.  Finish with a layer of rice.  Don't dump the rice in, because it will compress, and the final result will not be as light.
building layers
  • Using the handle of a wooden spoon (or in my case, a honey dipper), make three holes in the rice all the way to the bottom of the pan.  This will help the tahdeeg, or crisp base, to form.
  • Melt half the butter in a small pan.  Add saffron liquid and 2 T water and mix well.  Pour over rice.
  • Wrap the saucepan lid with a clean dishtowel and tie it tightly at the handle.  Use it to cover the pot as tightly as you can so steam does not escape.  (The dish towel keeps moisture from dripping into rice, making it soggy.  I didn't have enough towel to tie, so I used a big binder clip we usually employ to close bags of chips)  Cook the rice over medium heat 2-3 minutes, until you see puffs of steam escaping the lid, then reduce heat to low and cook, covered, 20 to 25 minutes.
  • Meanwhile, melt remaining butter in saucepan, add soaked cranberries, and fry, stirring often, 3-4 minutes.  Remove from heat and set aside for serving.  (I completely forgot this step, because I had mixed the berries earlier before mixing them with the nuts.  I think the complexity and unfamiliarity of the recipe had me a little flustered, but my result was still tasty, so I don't care)
  • Gently spoon rice from pan and sprinkle into a dome on a serving plate, or tip pan and spill rice into a  mound.  Use a spatula to loosen tahdeeg and flip it onto the serving plate.  Decorate rice with reserved nuts and berries and the fried cranberries.
Jeweled rice, with some tasty salmon lurking in the background.  It looked more delicious in person.
My Persian friend approved of my efforts, although she only had the pictures I posted online by which to judge.  The Chief Taster raved about it, even after I told her the four or five separate ways I had screwed up the recipe.  I would like to make it again, maybe even often enough that I actually get good at it and feel a little more confident about the endeavor, but next time I'll have a better idea of how to time things.  And now, so will you.

Thursday, January 30, 2014

Game Day Food

Apparently there's some sort of big game this weekend?  Or maybe a commercial showcase extravaganza?  I'm not real clear on the nature of the event, but I understand an awful lot of people are going to spend Sunday sitting on the couch, stuffing their faces, and screaming excitedly at the magical picture box.

Sounds like a good day for pretzels! (source: bread book)

2 t dry yeast (or one packet, whatever)
1 1/4 C warm water
3 3/4 C flour
1 1/2 t salt
egg glaze (beat an egg and 1/2 t salt in a tea cup, coffee mug, or small measuring glass.  Not right now--make it when you need it, just before baking)
sesame seeds, poppy seeds, or coarse sea salt, for topping


  • Sprinkle yeast into 1/2 C water in a small bowl.  Let stand 5 minutes, then stir to dissolve.  While you're waiting, mix flour and salt in a large bowl.  Make a well in the center and pour in the dissolved yeast.
  • Use a wooden spoon to draw in enough of the flour to form a soft paste.  Cover bowl with a dish towel and let "sponge" about 20 minutes.  The wet paste will become frothy and risen.
  • Mix in the rest of the flour.  Stir in remaining water, as needed, to form soft, sticky dough.
  • Knead 10 minutes, until smooth and elastic, then put the dough in a clean bowl and let rise until doubled in size (1 1/2 to 2 hours).  Punch down dough, then allow it to rest for 10 minutes.  (I usually need to sit down for about ten minutes after getting punched, too, depending on where I get it)
  • Divide dough into eight equal pieces.  Roll out each piece with your hands--remember making snakes with Play-Doh?  Same deal--until the dough snake is about 16 inches long.  Form the snake into pretzel shapes.  The easiest way is to copy the technique you see at the mall food court, though maybe at a slower speed.  Bring the ends close, give them a full twist around each other, then fold the twist back towards the loop you've made and press the ends into the dough of the loop, making the shape below.


  • Place the pretzels on a parchment-paper lined baking sheet (I always use parchment paper on baking sheets when making bread.  I may not always need it, but it sure is handy), cover with a clean dishtowel, and allow to proof (proofing is a secondary rise, after the dough is formed) until doubled in size, about 45 minutes.
  • Meanwhile, preheat your oven to 425F and make your egg glaze.
  • Brush the pretzels with egg glaze and sprinkle with whatever toppings you like.  Bake 15-20 minutes, until golden brown and delicious-looking.  Cool on a wire rack.

Get the mustard.  GET IT NOW!!
The first time I made pretzels was nearly a decade ago, when I was still getting the hang of bread dough, and I got very frustrated, and a little annoyed.  Since then, I've gotten better with bread dough, and now I love making pretzels.  This batch was made when I decided to make bagels, then changed my mind just before I started.  Admittedly, they close up quite a bit while baking, and the end result is more like a pretzel-shaped sandwich bun than an actual pretzel, but I don't see how that's a problem.  Pretzel buns are very trendy these days, and it gives you some options for how to eat them.

Thursday, January 23, 2014

Beau Thai

For a long time, we had a can of coconut milk in the kitchen cabinet.  Long enough that it has lived in at least two different apartments (which means the Chief Taster might have been living with that coconut milk before she was living with me).  Every once in a while, I would move it aside to get to something else and be reminded that I needed to do something with it, even if that something was just to move it to the back of the cabinet, out of my way.

When the Chief Taster discovered I could make chicken pot pie, it became one of the dishes which excited her enough to clap a lot when I suggested it, but it wasn't something she ever remembers to request.  One time, I suggested it, and she was thrilled at the impending pastry, but while I made the grocery list, I looked at the other side of the page in the BC cookbook, and saw Thai-Style Coconut Chicken, which requires one can of coconut milk.  It also called for serrano chilies; thanks to Dad's garden, we had a sack full of them in the fridge, waiting for a good use.  For a month or two, I'd slip a couple mystery peppers into whatever I cooked, and never told her about it, but the food was always tasty.

1 T vegetable oil
1 lb bite-size boneless skinless chicken chunks (I like to use thighs)
1 t grated lime peel
1 t grated ginger root (don't use ground ginger--they're not the same thing.  Peel the root before grating, and save the rest in the freezer.  It'll keep.)
1 clove garlic, finely chopped
2 fresh serrano chilies or 1 jalapeƱo chili, seeded and finely chopped (I used three serrano, but I think mine were a little on the mild side)
1/4 C finely chopped fresh cilantro
1 can (about 14 oz) coconut milk
1 t packed brown sugar
1/2 t salt
1 T soy sauce
1 C sugar snap pea pods
1 medium green bell pepper, cut into 1 inch cubes (that's what the book says, but anyone with a little math knowledge and experience with a green pepper will tell you that's impossible. Point is, big chunks of pepper are ok)
1 medium tomato, chopped (3/4 C)
1 T chopped fresh basil
hot cooked jasmine rice


  • Heat oil in wok or 12" skillet over high heat.  Add chicken and stir-fry until the chicken is no longer pink.  Add lime peel, ginger root, garlic, chilies, and cilantro.  Stir-fry 1 minute.

  • Pour coconut milk over chicken (it will come out in a big glob unless you do as the can says and shake the bejeezus out of it before opening.  Then, it still might come out in a big glob, but the heat will soften it and you can stir it in).  Stir in brown sugar, salt, soy sauce, pea pods, and bell pepper.  Reduce heat to medium and simmer 3-5 minutes, stirring occasionally, until veggies are crisp-tender.  Eat a couple to make sure.  Nobody will know, I promise.  Stir in the tomato.

  • Spoon into bowls of rice.  It will be almost like soup, but that's ok--a lot of Thai food is like that, and the broth is very tasty.  Top with basil.


Thursday, December 26, 2013

Pumpkin Bread Another Way

As I mentioned, despite my best intentions, I keep screwing up the amounts of thawed pumpkin I have on hand.  When I went to make the pumpkin pie for the Chief Taster's family's Thanksgiving, I read the recipe card (in my own handwriting, thus removing my last excuse) and found that I didn't need 2 C of puree, but 1.5.  This explained why my previous pie barely fit in the crust--I had used 2 C for that one.

I did it right for Thanksgiving, but then I had a tiny portion of leftover pumpkin, and I wasn't really sure what to do with it.  A couple weeks ago, I remembered it was still in the fridge, and I figured I should use it or toss it, and I hate to throw food away, so I decided to make pumpkin bread again.  I was all wound up for it when I remembered that I needed 1 C for a half-batch, and I only had 1/2 C.  Then I measured it (good call), and found that I really only had about 1/4 C.

But I still wanted to bake something, because it had been raining all day, and I was done working on Plan B for a while, and I had Spanish Chicken simmering away in the Crock Pot for five more hours, and it felt like fall, dammit, so I wanted to bake something.  Still, I only had 1/4 C of pumpkin puree.

Of course, there's also some leftover sour cream in the fridge that will pass its Use By date in a few more days.  Pumpkin puree is sort of creamy.  Sour Cream Pumpkin Bread doesn't sound like a bad idea, per se.

Kids: this will NOT taste like a creamsicle.
So I did it.  What follows is a sort-of recipe, or at least a record of what I did.

3/4 C pumpkin puree/sour cream slurry (I had about 1/4 C puree and 1/2 C sour cream.  I might have gone with 3/4 C sour cream, but that was all I had.)
1/2 plus 1/3 C sugar
1/3 C vegetable oil
1 t vanilla
2 large eggs
1.5 C flour (you can use whole wheat if you want.  Go ahead.  Pretend this is healthy.)
1 t baking soda
1/2 t salt
3/4 t ground cinnamon
1/4 t ground cloves
1/4 t baking powder
1/2 C chocolate chips
  1. Move oven rack so the tops of the loaves will be in the middle of the oven, and preheat it to 350F.  Grease just the bottom of an 8x4 inch pan.
  2. Combine pumpkin slurry, sugar, oil, vanilla, and eggs.  Mix well.  Really well.  Don't leave any lumps of sour cream.  Add everything except the chips. Mix well.  Add chips.  Mix again.
  3. Pour batter into loaf pan.
  4. Bake 50 to 60 minutes (I was closer to 65 before the toothpick test passed).  Check with a toothpick (inserted in the center, it should come out clean.  If it doesn't, give it a few more minutes).  Cool 10 minutes before removing from pan to wire rack.

Thursday, December 19, 2013

Pumpkin bread the (almost) right way

Around the same time we went apple picking, I bought a couple small pie pumpkins at the grocery.  We had just had our first day of fall weather (it dipped below 60F for almost an hour one afternoon), and I was all fired up for warm baked goods, stews, soups, and cocoa.  Plus, we were going to go share a cabin and some hiking with friends who had requested pumpkin pie.  I had big plans for apple butter (check), pumpkin pies (multiple requests to fill), pumpkin cinnamon rolls (pending), and I had theorized a formula for apple walnut cinnamon rolls (still just a theory--I ran out of apples).  Then, because it's Virginia, temperatures climbed back into the 70s and 80s for several weeks.  I've lived here for almost two years, and I'm convinced that there are two seasons: Way Too Warm, and Slightly Less Warm Than The Other Season.

But I digress.

After roasting and pureeing the pumpkin, I sealed it in handy 2 Cup portions and tucked them away in the freezer.  I got three or four portions of that size, and an additional 2/3 C, which is coincidentally the exact amount that I need for SK's pumpkin cinnamon rolls (I've made them before, and sometimes find myself in mid-July wishing fall would hurry up and fall so I can make them again).  I took this as a sign of kismet smiling upon me: I was meant to have those cinnamon rolls.

Naturally, after making a batch of pumpkin chocolate chip cookies (1C pumpkin required), I screwed up and grabbed the 2/3 C portion when I wanted the 1 C leftover portion and... anyway, despite my luck in picking pumpkin puree portions, I've been doing ok--except that I was excited about all the 2 C portions, perfect for pies, before I realized I only need 1.5 C for a pie.  I didn't look too closely at the recipe when I made that first pie, and was puzzled when I barely got the filling to fit in the crust.  In fact, I didn't figure that out until just before I sat down to write this post, four pumpkin recipes later.

One of those recipes was pumpkin bread.  I knew I had that 1 C of leftover puree in the fridge (when I realized I had the 2/3 C portion thawed, I just made pumpkin pretzels, only to realize I couldn't taste the pumpkin at all.  Whoops), and I had already checked the recipe, so I knew that would work.  Except I forgot that I had determined it would be enough for a half recipe, and didn't halve anything else as I happily dumped ingredients in a great big bowl, so I had to thaw a 2 C portion and make a bigger batch of bread.

For someone who used to be good at math, I've been terrible at tracking pumpkin fractions this fall.

Pumpkin Bread (adapted from Betty Crocker)

2 C pumpkin puree (or one 15 oz can--don't use the pie mix.  Just pumpkin puree)
1 2/3 C sugar
2/3 C vegetable oil
2 t vanilla
4 large eggs
3 C flour (you can use whole wheat if you want.  Go ahead.  Pretend this is healthy.)
2 t baking soda
1 t salt
1 t ground cinnamon
1/2 t ground cloves
1/2 t baking powder
1/2 C chocolate chips
1/2 C chopped pecans (the original recipe called for 1/2 C each of raisins and coarsely chopped nuts, but I wanted chocolate.  I threw in the pecans more because I had them handy than because Betty told me to.)
  1. Move oven rack so the tops of the loaves will be in the middle of the oven, and preheat it to 350F.  Grease just the bottom of a 9x5 inch pan (or two 8x4s).
  2. Combine pumpkin, sugar, oil, vanilla, and eggs.  Mix well.  Add everything except the chips and nuts. Mix well.  Add chips and nuts.  Mix again.
  3. Pour batter into loaf pan(s).
  4. Bake a 9x5 for 70 to 90 minutes.  Bake 8x4s 50 to 60 minutes.  Check with a toothpick (inserted in the center, it should come out clean.  If it doesn't, give it a few more minutes).  Cool 10 minutes before removing from pan to wire rack.
The recipe says you should let it cool completely (around 2 hours) before slicing, but seriously?  You're going to look at this thing of beauty and think, "nah, I don't need to stuff that in my face right now, while it's still warm and the chocolate's gooey, and it smells so good and--" (furious chewing noises).


Thursday, December 12, 2013

Rhinoceros

When I lived in Bend, a friend brought his family to visit for a few days.  We hiked to waterfalls, explored lava caves, and floated through town on rented inner tubes.  It was great.

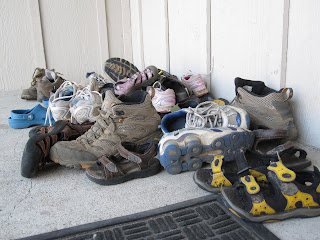
We made quite a shoe mountain on the porch after every hike.
I did my best to feed them during the visit knowing that there were three children, and an adult who doesn't "eat anything that swims."  I managed ok.  One of our dinners became a running joke; I had filled the Crock Pot before we left that morning, and when we returned, one of the kids asked what we were having for dinner.  Their dad told them "rhinoceros."  They didn't believe him, but then I extracted a large piece of bone, which happened to be shaped very convincingly like a rhinoceros horn.  "Sure it is," I told them, holding up the bone.  "See?"  I don't know whether the kids believed us, but when the mom posted on Facebook that we were eating rhinoceros sandwiches for dinner, she was immediately met with responses of "where ARE you??"

NOTE:  it wasn't really rhinoceros.  I like rhinos, and I'm very sad that the black rhino was recently declared extinct.  That's horrible.  But calling pulled pork sandwiches "rhinoceros" is too much fun to pass up, so the name stays.

The recipe is from Betty Crocker.

Pulled Jerk Pork Sandwiches
2.5 lb boneless pork shoulder (get it with a bone if you want to convince children it's rhinoceros)
1 T dry Jamiacan jerk seasoning
1/4 t dried thyme
1/2 C chopped onion
1 C cola
2 C barbecue sauce
sandwich buns

(If pork is tied or in netting, leave it in place for now)  rub jerk seasoning over pork, sprinkle with thyme.  Place in slow cooker and sprinkle onion over it.  Pour in cola.  Betty will tell you to to pour it over the pork, but that will wash away a lot of the seasoning you just applied, so I usually pour it down the side of the crock.  It'll be in there for hours; there's no chance of it getting too dry because you didn't dump a cup of liquid on top of the meat.

No rhinos were harmed during the making of this delicious meal.
Cover and cook on Low 8-10 hours.

Remove pork from cooker and put on a large platter or (my preference) in a big bowl.  Shred with two forks, and remove any netting or string.  Remove juice from cooker, reserving 1/2 C.  (You can set the rest aside and re-heat it for au jus style dipping, if that's your thing, but it's not mine)  Return pork and 1/2 C juice to cooker.  Stir in barbecue sauce.  Cook on High 30-45 minutes.  Serve on buns.  Watch Animal Planet.

Thursday, December 5, 2013

Butter me up

The Chief Taster and I decided to go apple picking one day this fall, mainly because she had the day off and we wanted to go do something.  Something that enables food usually seems like a good idea, and I had a lot of ideas for how to use apples.  Namely, I wanted to make apple butter.

The only time I clearly remember making apple butter was on a Scout outing.  It was a big council-wide event, and each troop had some sort of activity set up for people as we all cycled through the various areas.  My troop had built a rope bridge between two trees, but we also had a big iron pot sitting on the fire all day with apple butter slowly simmering.  That's the traditional way to make apple butter: outside, in a large batch, with a big group of people.  That's because you have to cook the stuff, stirring constantly, for about two hours, and it helps to have someone else take a turn with the spoon.  Sadly, they won't let me start fires in the courtyard outside our building, so I hung out by the stove for a while with a crossword and my nook.


Apple Butter
4 pounds apples
1 C cider vinegar
2 C water
about 4 C sugar
salt
2 t cinnamon
1/2 t cloves
1/2 t allspice
grated rind and juice of 1 lemon

  1. Quarter the apples and put them in a large pot with the cider and vinegar.  Cover, bring to a boil, and reduce to a simmer for about 20 minutes.
  2. Run through a mill (I have one of these, but Mom used one similar to this.  Either works.) and measure result.  Add 1/2 C sugar for every C of apple pulp.  Add seasonings, lemon rind, and lemon juice.
  3. Cook uncovered over medium-low heat 1-2 hours, stirring constantly.  You want it thick.  The longer you cook, the thicker it will get.
A couple notes: the nice thing about either of those food mills is that they mash and strain what you want, and leave what you don't want.  Seeds, stems, peel, and core chunks can be separated, and you only get tasty apple pulp in your food, so you don't need to core and peel the apples first.  In fact, you shouldn't.  Natural fruit pectin is in the cores, and that will help the apple butter gel.  I had a little trouble while cooking the apple chunks, because only the ones which were down in the vinegar and water got soft.  Solution: scoop apples out of the bottom and run those chunks through the mill while others cook.  If it feels soft, it's ready to mill.

You'll want to have your jars and lids prepared by the time you finish.  Use your favorite method; I boiled the lids and put the jars in the dishwasher.  I don't have a funnel, so I had to be very careful while ladling the apple butter into jars.  Leave a little headspace at the top, make sure there's no apple goop in the threads, and screw the lids on tight.  Then set the jars aside, and leave them alone.  You might hear the lids pop down as the jars cool.  They'll be safe for quite a while until you open the lids--then you should put them in the fridge.