summary

Cooking without a safety net
Showing posts with label main dish. Show all posts

Thursday, October 15, 2015

Cajun chicken stew

You know how sometimes things get away from you, and even though a task is in your To Do pile, you still lose track of it, and then you see it again months later and think, "oh, shit! I really wish I'd fed the dog!"

Then you're a terrible person. Take better care of your dog.

But if your forgotten task is typing up recipes, then yeah, I totally get that.

Dad likes to plant a garden in the summer. Two years ago, I helped with the planting. That time, it was entirely peppers and tomatoes, salvaged/rescued by my brother from an employer who was discarding the plants. Dad had so many that we started new rows in between the original rows, and his garden was so crowded that we lost track of what each individual plant was. The best we managed was a "hot" area and a "sweet" area for the peppers. Dad gave me almost all of the hot peppers. I think he was afraid they would be too hot, but I made good use of them.

This year's harvest yielded some bell peppers, and some peppers Dad didn't want to use. I don't even know why he planted them, but I appreciate the produce, and I'm entertained by using peppers of unknown ferocity when I cook. These turned out to be pretty mild, but the results were excellent. I used this recipe as my base, but I'm retyping it here FOR YOUR BENEFIT! ALL FOR YOU! because I hate the ads on that website.

Cajun chicken stew
3-6 T vegetable oil
3 to 3.5 pounds chicken. I used skinless, boneless thighs, didn't cut a damn thing, and let the cooking and stirring break it into smaller chunks.
2.5 t salt
1/2 C flour
1 medium onion, chopped
1 green bell pepper, chopped
if you like, add a Mystery Pepper or two
2 celery ribs, chopped (I used more than they did. Who buys just one stalk of celery, anyway??)
3 C water
1/4 t cayenne
3/4 C thinly sliced green onion
cook some rice, too.

  • heat the oil in a big damn pot (do you have cast iron? use that. Chicken is happier in cast iron), season the chicken with salt, and brown in the oil. Move browned pieces to a bowl somewhere.
  • Add enough oil to get about 1/4 C of juices in the skillet/pot, then stir in the the flour and cook over low-moderate heat until the roux (flour-fat mix) is dark. Think coffee-dark, but with just a little milk in the coffee. As it cooks, scrape the roux back and forth with a metal spatula to keep it mixed, and to prevent it sticking to the pan. Add onion, bell pepper, and celery, and keep scraping and cooking until onion has softened and starts to look translucent.
  • Add water and bring to a boil, stirring occasionally to get the water-roux mix homogeneous. Return the chicken (and any tasty juices that may have run off the chicken) to the pot and simmer, partially covered, 30-35 minutes. Stir int he cayenne and green onions. Serve over rice.
Some day I may write up my love letter to Slap Ya Mama. For now, I'll just add that the Chief Taster has also come to love this all-purpose seasoning, and liberally dosed her stew with it. The stew itself is rich, thick, flavorful, and looks nothing like what is pictured in the link above. Enjoy!

Thursday, October 8, 2015

coal miner's dinner

I usually have a pattern in these posts: I tell you what the cookbook said, and then I tell you what I did instead (intentionally or, as is more often the case, because I messed something up). Maybe that's a dumb idea.

I often tell you what cookbook I use, and if it's not a cookbook I recommend, I just don't post anything out of it. I mean, if a cookbook can't justify its existence with at least one good recipe, then what's the point? Besides food porn, anyway, and I'm not reposting that, because showing you someone else's photography is copyright infringement, and as someone who repeatedly (unsuccessfully) hopes to make money from his works, I have to respect copyrights. You want food porn, buy your own damn books. It's certainly less embarrassing than buying the other kind. I assume.

Getting back to food, if you've found that one recipe that justifies the book's inclusion in your collection, and you're comfortable making it, there's one of two reasons. First: it is easy, straightforward, and you have managed to never mess it up so badly that the results are inedible, toxic, or otherwise ill-advised. Second: you have made it "wrong" nearly every single time, but you're still so happy with the results that you don't care, and may have even reached a point where you open the book only to see the name of the recipe, or the pretty food porn, and then mostly ignore it for the rest of the process. Congratulations: you're a cook!

Dad likes to tell the story of something he was making to feed a Boy Scout troop on a campout. One of the moms looked over his shoulder and observed, "that's not what the recipe says." I don't remember what Dad actually responded, because by this point in the story, we're usually both laughing, but it boiled down to: "the recipe is wrong." This is also the point in his story when I often interrupt him by quoting the first time he told me the story: "perfect is not an exact science." I knew that his words had tripped over one another on delivery, but I still teased him by countering that's exactly what perfect means.

Anyway.

Does anyone ever really make a recipe by exactly following the recipe? From now on, I'm just going to tell you what I did, unless something went so terribly wrong that my way was a mistake. Maybe I just won't tell you about those times.

The Chief Taster found a couple recipes recently for pasta carbonara, picked her favorite, and made her dinner request. I glanced at the page, found that the only thing I still needed to buy was the pasta and some bacon, and later got worried at the grocery when I told the lady pouring wine samples what I was making for dinner, and she gleefully told me how she made it; her version had cream. I was fairly certain my book didn't show cream in the ingredient list. Should I buy some cream? I had milk. Maybe that would do? We were heading out of town that weekend, so I didn't want to buy cream unless I knew I needed it; I was already worried I'd have to dump some milk, because there's only so much I can reasonably consume in three days. Dammit. OK, I'll risk not getting cream. Fingers crossed.

I didn't need any cream. Which is the other funny thing about recipes: you can find about 639 different versions for whatever the hell you want to make. I had even spoken with the wine lady about how there are different versions of carbonara, and she said that it's supposed to be a simple dish (the name refers to the coal miners who ate it), but the kind you get in restaurants is all... [hand waving]. "Tarted up?" I suggested. "Yes!" She insisted that her way was the right way, and warned me not to let the cream and eggs curdle.

If she's to be believed, here is the wrong way--or one of them--which is still damn tasty, and probably easier, once I figure the timing a little better.

Pasta Carbonara
1 lb fettucini
3/4 pound bacon, cut hacked torn shredded into 1/2 chunks. I have a lot of trouble cooking raw, unfrozen bacon. The Chief Taster suggested scissors, but she didn't suggest it until I was almost done, and by then I was already frustrated and swearing a lot.
5-6 minced cloves garlic
ground black pepper (the book said "at least 1.5 t." I didn't measure mine, but I used that as a guideline)
6 large eggs, beaten
1.5 C (ish) parmesan cheese. I didn't measure this, either.
salt? (I forgot. Whatever. People salt the hell out of their own servings, anyway.)
chopped fresh parsley

  • Cook the bacon in a skillet until crisp, or you're happy with it. I was a little frustrated because my pasta water was boiling WAY before I was ready for it, and I was keeping one eye on my popovers, which were also ahead of schedule, because the bacon wasn't cooking fast enough, and was still sticking to the skillet a little.
  • At some point, you'll need cooked pasta. I had trouble getting things coordinated, so you're on your own figuring out the timing on that. I also can't help you with stringy pasta sticking together (this is why I almost never use spaghetti or fettucini). I need to work on that.
  • Remove the bacon and drain all but 2-3 T grease. Cook the garlic and pepper in the grease for about a minute, stirring frequently. A normal person will smell this. I did not.
  • Toss the bacon back in there, give it a stir, and turn off the heat. Dump in the cooked pasta, stir well, and cook for about a minute. If your skillet is too small for this, dump the bacon mix into the pasta. Just so everything's in the same place, warm and cozy.
  • You should have your beaten eggs gathered in a separate bowl so you can dump them all in at once. Do that now. Stir it all up, then ignore for a minute or two (remember that the heat is off. Between the skillet and the pasta, there's enough heat to cook the eggs when they're spread all over the pasta like that). Stir in the cheese. That last part was easy for me, because the Chief Taster was ravenous, and hovering over the stove waiting for dinner, so she stirred while dumped what I thought was probably the right amount of cheese into the noodles.
  • Top servings with parsley. Or not. I don't care. It's only a recipe, after all.

Thursday, September 24, 2015

syrupy salmon

Friends got us a cast-iron cookbook for Pi Day (what, you're not observant of math holidays?), and I sometimes browse through it for food ideas guaranteed to be excellent. This time, I was trying to find the Spanish Chicken Stew recipe I knew I'd made, but my efforts were in vain (turns out it was in my notebook, because I'd made up the recipe. I'll get to it soon, really). On my way from cover to cover, I made the mistake of showing the Chief Taster a salmon recipe with a full-page picture.

"Make that. Now."
"Now?"
"Tonight. Do we have a dinner plan for tonight? Can we make that instead?"

I had to buy a couple things I've never bought, but they were conveniently near each other in the "Asian" section of the grocery (four feet of shelves at the end of an otherwise unrelated aisle). And I didn't get the sauce thickened to the "glaze" consistency recommended, but she was still pretty happy with the results. More on the subject of making women happy follows the recipe.

Salmon with balsamic Thai chile glaze
4 scallions (white parts)
4 inches of the green parts of aforementioned scallions (I can never find scallions. Sources I've found say they're the same thing, so I always use green onion when a recipe says "scallion." No one has died, so I guess I was right. I did not see the "four inch" part of the recipe until typing this post, the day after making the food, so we had lots of green onion. I used the rest in breakfast the next day. No worries.)
salt and pepper
4 to 6 (6 oz) salmon fillets with skin attached (I bought a 12 oz slab of salmon and cut it in half. I didn't adjust sauce quantities. That's part of why I had so much sauce, but not why it didn't thicken)
2 T vegetable oil (or canola)
1 T Asian sesame oil
3 garlic cloves, minced
2 T grated fresh ginger root
1/2 C sweet Thai chile sauce
1/4 C firmly packed brown sugar
3 T soy sauce
3 T balsamic vinegar
1 to 2 T freshly squeezed lime juice (I cut a golf-ball-sized lime in half and squeezed the hell out of it in my hands. That gave me 2 T)

  • Chop the scallion whites and set them aside. Thinly slice the green portions and set them aside. They'll be garnish later. The whites will go into the skillet with the sesame oil, garlic, and ginger, so you can put all of that in the same bowl if you want, but use a spatula to clear it so you get all the oil.
  • Season the salmon with salt and pepper. I put on a lot, because that's how I cook steaks, too, but under the sauce I don't think I could taste it. Still, it's good to use when searing, so don't skip that.
  • Heat a 12" skillet on high heat. Coat with the veg oil. Put in the salmon, skin side up, and leave it the hell alone for about four minutes. Don't flip them, don't move them around, don't peel them up and look at the fleshy side. Pretend they're your ex at a party and just turn your back on the damn things, ok? Maybe take a look every once in a while to see how they're cooking (you'll see a color change creep up the edges of the fillets). I used this time to frantically finish the sauce ingredients I'd forgotten, like the grated ginger and minced garlic.
  • Flip the fish and let it cook skin side down for another 2-3 minutes, then move it onto a warm plate. (I neglected to warm the plate for two reasons. First: I was using the oven to roast some potatoes at 400F. Second, I was a little gun-shy after destroying one of our new pie dishes with a rapid temperature change. Luckily, the sauce cooks up quick, and the fish only cooled enough to be edible.) The book says to wipe out the skillet with a paper towel, but there was nothing in my skillet once the fish was freed, so I skipped that.
  • Put the skillet on medium-high heat. Dump in all the stuff that goes with the onion whites. Cook and stir 30 seconds, until fragrant. I have almost no sense of smell, and that sesame oil was still plenty fragrant. Those of you whose noses are more than decorative will have no trouble telling when it's ready to:
  • Add chile sauce, brown sugar, soy sauce, and vinegar. Stir and cook 2 to 3 minutes, or until syrupy. Turn off the burner, stir in the lime juice.
  • Top each serving of the salmon with a generous dose of the glaze. Mine were practically swimming again, but I had all those roasted potatoes, too, and despite my careful application of seasoning (which amounted to pulling four or five jars out of the spice rack, thinking, "yeah, that sounds like a good idea," and then liberally shaking them over the taters), the sauce soaked in and overpowered everything I had done. We didn't care. It's good sauce. I had some left over, and I'm not sure what to do with it, but I'll find out this week. Top with green onions.

A while ago, I mentioned an idea I had for a cookbook called "How To Please A Woman." It's been a recurring theme of jokes and discussions ever since. One friend in particular has been campaigning hard for this idea. She may be more excited for it than I am. I have two hypotheses as to why. First, her outlook on publishing has not taken the pummeling that mine has. Second, I suspect she hopes to be a taste tester for the featured recipes. Can't blame her optimism.

I had been drifting away from the idea for a couple months now, because I've been disappointed with repeated failed efforts to get my work printed, and because, as I told the Chief Taster and our glass-blowing friend, "Every asshole with a food blog has a cookbook. But every other asshole with a food blog also has a big following. I can count my followers without removing my shoes."

Thing is, I'm pretty much the only person who understands what the title of this blog means. Starting a new site with a title like "How To Please A Woman" makes it much more appealing and accessible. The glass blower believes this will go a long way to attracting more followers. This is where you come in. You had to find this post somehow. However you got here, leave me a comment below (or you can contact me directly) and let me know whether you have interest in a new site with pretty much the same content (it's also been suggested that I could have polls connected to each recipe. I like that idea, too). Still me writing recipes to try, but with a specific goal in mind: scoring chicks!

Thursday, September 17, 2015

Stuffing more peppers

I've made stuffed peppers before, and it went really well. Yes, there were some shortcomings; namely, I couldn't taste the cheese. A friend believes that the only properly stuffed peppers are stuffed with cumin. Some variations are meat-heavy, while others are almost entirely rice. Point is, you can stuff just about anything into a pepper with a reasonable degree of success.

When I asked the Chief Taster what she wanted for dinner this week, she found this recipe online. I, in turn, dutifully bought what I needed, then started making changes through conscious effort, mistakes, and sheer laziness. This is my version.

"Mediterranean" Mushroom stuffed peppers (in case every recipe needs a name)
Olive oil
3/4 C chopped onion. I really don't know how much I used. I had half a large onion and used all of that. Whatever. Recipes are suggestions, dammit!
salt
pepper
1/2 t allspice
1/2 t garlic powder (I wanted to mince some real garlic for this, but I forgot)
8 oz can chickpeas, drained and rinsed
8 oz fresh mushrooms
handful of parsley, chopped to bits
1 generous C long-grain brown rice (because I had slightly more than 1 C left). Her version soaks the rice for 15 minutes. I had mine in a bowl for closer to 20, but given the amount of liquid involved, I'm not sure the soaking is really necessary. Experiment at your discretion.
1/2 t paprika
8 oz can tomato sauce (she uses 3 T. What do you do with the rest of the can?)
3/4 C chicken broth
6 bell peppers, tops and ribs removed

  • Heat the oil in a big, deep skillet. cook the onions in there until they turn translucent. Dump in the meat and season with salt, pepper, allspice, and garlic powder. Caveat: I only said "1/2 t" because she did. When I made it, I didn't measure the onion, salt, pepper, garlic, allspice, parsley, or paprika. If I did measure, it was all by eyeball, and I purposely overshot on all seasonings because I like strong flavors. Do what you will.
  • Cook the beef. Stir in the mushrooms and chop at them a little with the spatula, because small pieces pack more easily into the peppers. Don't go too crazy--you still want to taste the mushroomy goodness (Cindy, I'm looking at you). Stir in the chickpeas and cook a couple minutes.
  • Add the parsley, rice, paprika, and broth. I messed up a little here. Her recipe said "add the water," and I looked up and saw "3/4 C broth (or water)" in the ingredients, so I dumped in the broth. Then I saw "2 1/4 C water" listed a little higher. I left it alone with my extra tomato sauce, and nothing bad happened! Plus, I didn't have to simmer the damn thing another twenty minutes while all that liquid cooked off. Anyway. Bring to a boil, then reduce heat and simmer, covered, 20 minutes. You want the rice to be cooked.
  • While that simmers, cut off the tops of the peppers and scrape out the insides. If you think this is tedious work, imagine scooping the glop out of a pumpkin so some thankless kid can have all the fun of carving it, and it will feel like a breeze (next month: pumpkin pie!) I cut down from the top on five of my peppers because I wanted them to hold together better, and contain more Stuff, but one of them had a nasty spot on the top, so I had to slice straight across for that one. It slimed me. It was gross.
  • Stand the peppers up in a baking dish (my 11x7 was a perfect fit). Pack them full of tasty stuffing. (Has anyone tried stuffing stuffed peppers with stuffing? Thanksgiving style? The sausage kind? WHY THE HELL NOT??) Pour water into the baking dish (NOT into the peppers) 3/4 to 1 inch deep.
  • Have you pre-heated the oven to 350F? No? Go back in time and do that.
  • Tightly cover the baking dish with foil and bake for... I don't know. Half an hour? Everything inside the peppers is cooked, so you really only want to get the peppers softened. Do what you want.
  • She suggested serving with Greek yogurt. We just had normal (plain) yogurt. It helped. I think sour cream would be fine, too.
One more note: She grills her peppers. I didn't. Because we only have a Foreman-style grill, and that just won't work. In the past, I boiled the peppers a little to soften and pre-cook them. This time I stuffed raw peppers and baked them 30 minutes. They were tender enough to eat, but firm enough that the Chief Taster used a knife to cut hers apart. I still had no complaints, and she reported high success on the recipe.

No food porn this week. I'm tired of making really good food in my fun-size kitchen and then getting shitty photos because there's only one crappy light fixture which casts shadows on EVERYTHING I DO. You want food porn, go look at the link. There's a dozen pictures of the same damn peppers. At least show the different steps, woman!

Thursday, March 19, 2015

kheema get it

In the interests of full disclosure, I should tell you that I'm a little embarrassed by that title pun.

Each week, I pick an entree, and the Chief Taster picks an entree.  I'm willing to cook just about anything, but neither of us wants to choose dinner all the time.  This is the best system we've devised, and it really doesn't work that well.  Some weeks I'll have five or six great ideas and won't ask her for any.  Some weeks, she keeps putting off deciding, and I have to resort to a fallback position of lasagna, tuna casserole, or reuben soup.  I feel curiously unsatisfied with those first two options, not because I don't think they're tasty, but because I've made them both so often that I don't really need the recipe much anymore, and it feels like a cop-out.  I can't say anything negative about reuben soup.

Given her reticence to choose, I was intrigued when she pulled cookbooks one morning before she left for work.  She may not have known exactly what she wanted, but she had regional flavors in mind; she grabbed the Indian and Mediterranean cookbooks from the shelf.  She stuck to the first volume, and indicated two choices each for entree and vegetable dishes.  I wanted to try the Bengali-Style Mustard Fish, but I don't think fish make good leftovers, so we shelved that one for later.  I'd already made the Spinach, Red Pepper, and Chickpea Bhaji, and wanted to try something new, so our options were thus narrowed to Pork Kheema with Peas (below) and Minted Rice with Tomato and Sprouted Beans (next week. Maybe when I get ambitious, I'll start posting more often, but that time is not now).

It must have been a successful gambit, even though the kheema recipe recommended serving with flatbread or plain rice, because her reaction when she saw the food (and to a greater extent when she started eating it) was what I would expect if she came home and learned I'd bought her a dream home.  I am now even more convinced that my next long-from work should be the cookbook titled How To Please A Woman.

Pork Kheema with Peas

1 T sunflower oil (or vegetable oil.  Or canola.  Whatever's handy)
2 garlic cloves, minced
2 jalapenos, seeded and chopped
1 t ground coriander
1 lb. ground pork
2.5 C fresh or frozen peas (the book says frozen peas are more nutritious.  I find them more handy)
3 T medium curry paste (I used hot, because the grocery didn't have medium)
3 T tomato puree (what the hell is that?  I used tomato sauce, and put the rest of the can in the fridge for later use in pasta sauce)
2 tomatoes, finely chopped
1 t raw sugar (I don't have raw sugar.  I used granulated.  I don't think it matters)
1 C boiling water
2 T plain yogurt
large handful chopped cilantro (the Chief Taster is rabid for cilantro, so I bought a 3/4 oz clamshell of it and used the whole thing)
salt

  • heat the oil in a big skillet.  Add the jalapeno, garlic, coriander, and meat.  Stir-fry until meat is lightly browned.
  • Add the peas, paste, puree, tomatoes, and sugar.  Stir and cook 3-4 minutes, then add the water.  Bring the whole mess to a boil, then cover it and reduce heat to let it simmer 8-10 minutes.
  • Turn off the heat and stir in the yogurt, salt, and cilantro.
She got home while the skillet was covered, offered to stir the rice, and used the opportunity to sneak a peek at the pork.  Then she made various happy noises and professed her undying love, but I was chopping cilantro at the time, so she might have been talking to the greens.  My only beef with this pork is that the water never cooked out, leaving the dish a little soupy, and I wonder whether that weakened the flavor of the curry.  I might try it with less water, or none at all.  The tomatoes were pretty juicy, and that might be enough.


Thursday, March 5, 2015

A conceit of pasta

I hiked the Appalachian Trail last year.  Have I mentioned that?  Forgive me; it's just that I get so many speaking engagements these days that I can't remember who's heard what.

While hiking the AT, you fuel yourself by eating a lot of crap.  Junk I'd never eat in my normal life becomes staple cuisine while backpacking for months on end.  Daily Snickers, Pop-Tarts, peanut butter and Nutella straight from the jar, handfuls of M&Ms, entire pizzas, you get the idea.  One morning I got into a town in Virginia and found one of those Dunkin Donuts/Baskin Robbins hybrid joints, and told them my plan for a new sundae: a banana split on a foundation of three donuts.  They didn't have a dish large enough for my creation, so I just ate the sundae with a side of three donuts.  For breakfast.  That's a normal thing.

During the hike, I learned that I still clung to one of the joys of childhood: mac and cheese.  I hadn't had it in ages, but I learned while hiking exactly how much water to use to cook the noodles so that I didn't have to drain anything, and the leftover moisture made the cheese sauce for me.  Some nights, I'd add chopped summer sausage or torn bits of beef jerky, if I had them, and sometimes I'd stir in some peanut butter, and was always disappointed that I couldn't taste it.  Don't look at me like that.  Peanut butter and cheese WORK together!! (see: Quinn)

Even after the trail, I found that I sometimes craved macaroni, and usually I just wanted that powdered-plastic cardboard box variety I'd eaten on the trail (prefereably in one of the exciting new flavors available that summer.  I'm still sad that I never got to try Three Cheese Jalapeno), but occasionally I'd grow the hell up and decide that if I were going to have mac and cheese, I should put more than seven and a half minutes of effort into it and bake the stuff, with some veggies and other tasty things.

One night on the trail, a few hikers were gathered... somewhere.  I honestly don't remember now whether it was a campsite, shelter, hostel, or even if it was really nighttime.  It might have been the middle of the afternoon.  Point is, we were talking about food, because backpackers always talk about food.  We obsess over it.  We fantasize about it.  We sometimes express our fondness for food by suggesting the performance of really inappropriate acts with it.  Well.  I say "we," but in my experience, it was only that one guy.  Still, the rest of us knew what he meant.  Moving on.  We started talking about macaroni.  I admitted that I craved it, and tried to have it about once a week during the thru-hike, but usually didn't manage that frequency. I also mentioned that I'd tried a couple baked macaroni recipes at home, but hadn't really found one that I liked.  One of the other hikers told me that he liked to layer it in a baking dish like lasagna, with intervening layers of mushrooms, onions, peppers, or bacon.  It sounded amazing.  For the rest of the trip, I couldn't think of macaroni without thinking of it layered with sausage and mushrooms.

When I finished the hike and started cooking in a real kitchen again, I remembered the layered macaroni.  Then I made lasagna, gave it some thought, and decided that I couldn't layer it deeply enough to satisfy my whims, because macaroni noodles take up a lot of space, and my 9x13 isn't deep enough to hold many such layers.

So I did this instead.

Macaryan and Cheese (see what I did there?)

16 oz macaroni (or some other pasta shape.  I don't care.)
good-sized bunch of fresh spinach.  A handful? I guess?
olive oil.  Just a tablespoon.  Two, tops.  We just need it to keep the spinach from sticking to the pan.
2 cloves garlic, minced
1.5 C red bell pepper, chopped
1/2 C chopped onion
1/2 C butter (that's a stick, unless you buy weird butter.  Or, I guess, weird sticks?)
8 oz fresh mushrooms, sliced
4 oz can sliced black olives
1/2 C flour
1 T ground mustard (the dry powder stuff)
1/2 T lemon pepper
1 t pepper
3/4 t salt
12 oz (about 3 C) shredded Monterey Jack
2 C milk

  • Boil some water.  Cook the macaroni.  While you're at it, get that oven preheating to 350F.
  • While your water comes to a boil and your macaroni cooks, get started on the rest of this stuff.  Start by heating the oil in a skillet with the garlic.  Add the spinach, stir to coat, and cover over low heat for 2-3 minutes, stirring occasionally, until the green stuff is all wilty.  Move the spinach and garlic to a plate.  We're going to keep using the skillet and oil.  I'm a big damn fan of my Lodge combo cooker, so I used that, and when it came time to bake, I didn't even need another dish.  Which is good, because I'm super lazy, and it meant fewer dishes to wash later.
  • Add the butter and the rest of the veggies to the skillet.  Cook them.
  • Add the flour, mustard, and seasonings to the skillet.  Keep stirring.  The butter and flour will form a roux, which helps to thicken the sauce.  Toss in the cheese and milk, then remove from heat.
  • By now your pasta should be done.  Drain it, and stir it in to the cheese mixture with the spinach.  If you're using a separate baking dish, make the transfer now.  If you're lazy like me, use that time to do a little dance.
  • Stick the whole mess in the oven for 40 minutes.  The Chief Taster thinks crumb toppings should be applied whenever possible, so I added that for the last fifteen minutes of baking.  If you want a crumb topping, melt 2 T butter, and mix in 2/3 C crumbs (I bought a carton of panko for the occasion) and 1/3 C parmesan (because why wouldn't I want more cheese?), and apply as directed above.

This version just happened to be vegetarian, but I think it would be good with some ground sausage or cubed ham.

Thursday, February 19, 2015

Live ferns and dead jokes

The Chief Taster is a big fan of the CW show Arrow. I watched a few episodes with her, but soon discovered I couldn't tolerate all the aspects which I perceived as tremendous shortcomings in writing, acting, and characterization, and which she perceived as not existing.  Now I generally go to another room to read while it's on, passing through only to get a drink of water from the kitchen, or when I remember that I still have dishes to do.  Occasionally, when she gets home late on a Wednesday, we don't get to have dinner until the show starts, so I'll sit in until my food is gone before going to do the dishes. (Clean dishes, much like hot meals, are one of those things she has come to assume "magically appear.")  That's how I learned that on any given episode, there is not just one, but up to four or five different archers.  Most of them are on the same secret vigilante team, hanging out in the same "arrowcave," which was spruced up with a live fern by the only person in Starling City who doesn't own a goddamned bow and arrow.

"Why did she buy a fern?" I asked.  The Chief Taster made the sort of noise she makes when I'm talking and she doesn't care, because she's trying to follow the intricate plotlines of who's giving whom the shaft (another joke I made which she refuses to add to her online forums of Arrow fans).  "She should have gotten a pet chicken," I added.  This apparent non sequitur broke her reverie.  "Wait, what?  Why a chicken?"

"Because then they could be Arrows con Pollo!"

Then she made the noise she makes when she heard me, but wishes she hadn't.  I told her to use the joke on her fan forums so I could gain Internet Celebrity and be really rich and stuff, but she has so far refused or forgotten.  I assume she's worried about losing me to my legions of new fans.

Every once in a while I make this as a reminder, but it doesn't do any good.  However, it is very tasty.

Arroz con Pollo

I use this recipe, because somewhere in my research I found something that said "true" arroz con pollo should be cooked with beer, and that seemed like a great idea, and this was my favorite recipe from the search for "arroz con pollo with beer."  I've made a few changes, though, so I'll go ahead and rewrite my version below.  Keep in mind that because I'm a gringo, it is unlikely to qualify as "true" arroz con pollo with the most exacting foodie in your life, but it's damn tasty, and you don't have to tell anyone you got the recipe from a white boy from Oregon.

4-6 strips bacon (I made it once without any bacon, and substituted some vegetable oil to saute the veggies with no problems)
8 chicken thighs, bone in, skin on (the three guys from Miami insist that if you use boneless skinless thighs, you will ruin the dish.  I tried it, because I like to challenge convention, and the results were still tasty.  Do as you will.)
salt, pepper, and cumin to season the chicken
1/2 C olive oil
1 chopped onion
1 chopped red or green bell pepper (I've never been able to find cachucha peppers)
4 cloves minced garlic
12 oz bottle of beer.  Any beer, but pick something you like, because then you can drink the other five with dinner.  Or, if you choose, share them with whoever's eating dinner with you.  Whatever.
3.5 C chicken broth
8 oz can tomato sauce
1/2 t Bijol powder (I've never been able to find this, either, so I subbed 1/2 t each of paprika and turmeric.)
1 bay leaf (following Dad's rule, whenever a recipe calls for one bay leaf, I use two.)
2 t oregano
2 t cumin
1.5 t salt
1/2 t pepper
3.5 C brown rice.  Wild rice.  whatever you have handy, really.
1/2 C frozen peas

This is where I diverge further from the Miami guys' instruction and end up just telling the story of how I made it, and why I did it that way.  If you've ever read any of my previous posts, you already knew that.

Chop the bacon into bite-size chunks.  Toss it into a good-sized skillet or saute pan.  I used something big and cast iron, because that's how I roll.  My original plan had been to use this pot for the entire process, but I quickly realized that it was nowhere near big enough.  For me, that was good news, because it meant I finally got to justify owning the enormous eight-quart stockpot that came with my original set of pans.  I'd used it a couple times for apple butter and pumpkin, but it usually just hides in the back of the cabinet, out of the way.  Now I use it for arroz con pollo and a Spanish chicken stew which I plagiarized from Panera.

Cook the bacon in whatever you're using.  We're using the fat to cook other stuff, so if you're one of those "microwave bacon" people, don't do that.  Skillet, dammit.  When it's starting to crisp nicely, transfer it to your Big Damn Pot (if you do not have a Big Damn Pot, consider reducing the recipe, or buying a Big Damn Pot).  While the bacon is cooking, season the chicken pieces with salt, pepper, and cumin.  Rub it in there good.  Then stick the chicken pieces in the hot bacon fat and brown them on all sides before putting them in the BDP with the BCN.  Keep that skillet hot, because now you're going to cook the onion, bell (or coocoocachoo) peppers, and garlic (you might want to add the garlic a little later than the veggies, so it doesn't overcook, but I've never had any trouble) until crisp-tender and the onion is translucent.  Guess where they go next?

...I hope you guessed the BDP.  Add everything else except the rice and peas.  Crank the heat, bring it to a rolling boil, reduce heat to low, cover, and cook it for 15 minutes.

Add the rice, bring it back to a boil, then reduce heat and cook it for 30-45 minutes, until the liquid is absorbed and the rice doesn't crack your teeth when you steal a bite.  When the rice is ready, stir in the peas and give it another 5 minutes of low heat.  Turn on the tube to your favorite archery-related program, open one or more of those five remaining beers, and enjoy.


Thursday, December 18, 2014

When the cows come home, eat them.

We realized when we got back from the farmers market that we already had ground beef; since we had just bought more, the week's challenge became: use ground beef.  My first thought was to make a "Cowherd Pie," because shepherd's pie sounded good, but we didn't have any lamb.  Then I found out that a shepherd's pie with beef already has the (uninspired, and inexplicable) name "cottage pie," and is usually found in England and Australia.

I love when articles online say that a food is "found" in certain areas, like it's a wild species roaming free across the African veldt until someone sticks a serving spoon in it and puts it on the table.

I also found out that shepherd's pie (and cottage pie) is usually topped with a baked layer of mashed potatoes, which was a little confusing, because I thought I'd had it with a pastry crust.

I didn't want mashed potato topping.  I wanted biscuit topping.

Hence, I give you the first draft  of "cabin pi."  Cabins are almost the same as cottages, but more rustic and American, like biscuits.  "Pi" because math, dammit.  And because mine was round, not baked in a rectangular casserole.

Here's what you need:

  • 1 lb ground beef
  • 3/4 to 1 C carrot, sliced
  • 1 C onion
  • 1 C bell pepper (pick your favorite color.  I only used it because I had one in the fridge)
  • 2 cloves garlic, minced
  • 8 oz sliced mushrooms
  • 1 C broth (whatever's handy)
  • 1 1/2 C frozen veggies (I had peas and corn.  I also only meant to use 1 C, but I over-poured, and it was too much trouble to pour the frozen corn back into the bag)
  • kosher salt
  • black pepper
  • rosemary
I also meant to include thyme and Worcestershire sauce, but I forgot both.  Maybe I should have organized my notes better.

Also, for biscuit topping (because if you don't use a biscuit topping, then it's not a TRUE this thing I just made up):
  • 1/2 C melted butter
  • 1 1/2 C milk
  • 1 1/2 C flour
  • 1 1/2 t salt
  • 1 1/2 t baking powder
Here's what you do:
  • Preheat your oven to a piping hot biscuit-baking temperature of 400F.
  • Brown the ground beef in a deep skillet, seasoning with salt, pepper, and rosemary.  If you're rollin' like a cabinite, use cast iron, because it will save a step later.
  • Add the carrot, bell pepper, and onion.  Cook until tender-crisp, stirring occasionally.
  • Stir in the mushrooms.  Give them a few minutes to soften and soak up juices.  Stir occasionally.  Add the broth (thyme and Worcestershire), bring to a boil, then reduce heat and let the whole mess simmer a few minutes while you get the biscuit topping put together.
  • Make your biscuit topping.  Mix all those ingredients together.  Easy, right?  Pro tip: don't use this recipe to make actual biscuits.  It is WAY too runny for that to work.
  • Add frozen veggies to the meaty mixture.  Give them a stir, too, since we've developed a habit.  Let it cook for another four or five minutes, then turn off the stove.
This is what I had before adding the topping.
  • Remember when I said deep cast iron could save you a step?  It's this one.  You can either pour everything into a baking dish (I'd suggest a 9x13, but I'm just guessing.  I know the beef mixture doesn't look like much, but those biscuits will rise.), or go to the next step.
  • Pour the biscuit topping over the meat mix, trying to cover it evenly.  Scrape the bowl with a spatula--you want all the biscuity goodness you can get in there.
  • Bake until biscuits look done (golden to golden-brown).  Mine took about 45 minutes.

See? Doesn't that look tasty? Looks are NOT deceiving.  It was fantastic.

"That's no canyon... that's my dinner!"
The results were fantastic, and I say that as a thoroughly modest person.  Only an effort of supreme will kept me from eating the entire pan full of food and making the Chief Taster watch; she was similarly afflicted.  I still wish I'd included the Worcesterchire and thyme, but that's ok--I'll make this again.  I might even try it with beer instead of broth.  Now THAT'S a cabin pie!

Thursday, November 20, 2014

Better for leftovers

Each week, I try to figure out what to make for dinner.  Each week, I waffle between tried-and-true and something new.  I tend toward the second option because I feel like I need a new challenge.  Often, once I've tried a new recipe, I feel like I have a pretty good handle on it.  Besides, when I try new stuff, I learn new stuff.  And I want to learn new stuff.

The problem lies in deciding what new stuff.  Familiar things are easy to remember; new things are harder to name, unless it's something with a popular name, which usually means it's well known because it's not very easy to make; the sort of thing you only get at restaurants, because who the hell makes it at home?  Once, when I was pretending to be a nurse, my aunt asked me what I wanted for dinner.  She did this often during that period: delivering a meal about once a week because she knew how much it helped.  I started running out of ideas, and said something ridiculous, never thinking she'd actually make it.  "Chicken Kiev," I told her, figuring it would be like the items I put on my Christmas list and never expected to see (the Red October sub; a yellow sports car; a penguin who could make me waffles for breakfast).  Then she went and made it.  I had no idea how laborious it would be.  Hell, I didn't even know what it was until she showed up with a baking dish full of dinner.  It was just some words I'd heard used together.  After that, I went back to casseroles for all of my requests.  I felt guilty.

Lately, I've started to feel burnt-out on texture.  I wanted something crispy, but when you look for recipes using the word "crispy," all you get is fried chicken and kale chips, and half of those recipes are attempting to rip off The Colonel, whose work never impressed me that much anyway.  Then we went out for Thai food, and I saw fried rice on the menu, and felt inspired, even though it's not crispy.  At least it was something I'd never (successfully) done.

I used this recipe, but I changed it a little.  I didn't use prepared (parboiled) rice because I didn't want to take up valuable space in my kitchen cabinets with a third kind of rice.  I just cooked 2 cups of brown rice the way I usually do, and continued from there.  That was my first mistake.  Not the brown rice--using 2 cups of it.  My second change was of necessity.  I couldn't find roasted pork at the grocery, and I couldn't find an Asian grocery near our place, so I chopped the three chicken thighs I had in the freezer into little pieces and threw them in the skillet to cook before adding the veggies.

The egg cooked beautifully, just as suggested in the directions.  I'd tried making omelets for breakfast Sunday morning, and they didn't turn out half as well as the big disk of egg I used in dinner Tuesday.

I was halfway done adding the rice when I realized I needed more space.  A lot more.  If you're making this meal in your trusty 12" Lodge cast iron skillet, switch to something larger (got a Combo Cooker?) as soon as possible.  Once I'd dumped one big pan into an even bigger pan, I gave it all a good stir and decided two things.  First: I did not need the second half of the rice.  Second: I might need a little more sauce.

Lesson learned: Fried rice is a great way to use up yesterday's leftover steamed rice.  Adjust quantities of all other ingredients to suit.

On the plus side, the Chief Taster really liked it, even declaring "it looks just like the real thing!"

...even if it wasn't crispy.


Thursday, October 30, 2014

lamb and things

This week's recipe comes from the excellent and gorgeous Pomegranates and Pine Nuts, by Bethany Kehdy.  She calls it "Auntie Anwar's Mansaf Risotto," but I don't have an Auntie Anwar, I don't know what "mansaf" means (until it occurred to me to check Wikipedia while writing this sentence), and I didn't know until after making this for dinner that risotto is just a rice dish.  I don't know what I thought it was instead, but I thought it was somehow more complicated than "rice in broth."  Hey, I learned stuff!  Kehdy mentions in the book that she has "tweaked" her aunt's recipe.  You'll notice I kept tweaking, or more accurately, I got lazy about sourcing some ingredients.

Bethany's Auntie Anwar's Lamb and Rice and Yogurt Stuff
2 T butter
30 ounces lamb shank(s)
2 carrots, roughly chopped
1 onion, quartered (I think onions are getting really big, so I quartered half an onion, and I think it was enough.  Do what you will)
10 garlic cloves.  Mince 5, leave the other 5 whole.
6 cardamom pods
1 bay leaf (sticking with Dad's tradition, whenever the recipe says "1 bay leaf," I use 2.)
1 cinnamon stick
1 C short-grain or risotto rice (I didn't want a third kind of rice in my tiny kitchen, so I used long-grain brown rice.  The nice thing about serving a new recipe to people who've never had it before is that as long as they think it tastes good, they won't know you did it wrong)
1 t turmeric
3 1/4 C Greek yogurt
1 egg
1 T cornstarch, if needed (I didn't.  The yogurt looks pretty runny when it first starts to cook, but thickens if you give it a little time)
3 T pine nuts
3 T blanched almonds (I couldn't find these, so I used sliced almonds.  I'm too lazy to blanch my own almonds unless the recipe makes a sufficient case as to why blanching matters)
juice of 2 lemons (I used 4-6 T lemon juice from a bottle)
mint leaves, finely chopped, to sprinkle as a topping
salt and black pepper

  1. Melt the butter in a large, heavy-bottomed saucepan.  I used my Lodge combo cooker, because I use it whenever I get an excuse.  Add the shanks, carrots, onion, whole garlic cloves, cardamom, bay leaf, and cinnamon, and cook 4-5 minutes, turning frequently, until meat is brown.  Salt to taste, then add 5 C water and bring to a boil.  Reduce heat, cover, and simmer 1 hour, until meat is tender and falling off the bone (Mine wasn't quite "falling off" the way I expected, but it was pulling away from the bone, and I figured it was ready).  Strain well, reserving stock and meat, but discarding veggies and spices.  (Have you ever boiled a cinnamon stick?  It unrolls, and looks like a curled cinnamon sheet.  Neat!)
  2. Put the meat in a bowl to cool a little.  We'll get back to it later.  For now, put the rice, 3 1/4 C of the reserved stock, and the turmeric in a separate saucepan, bring to a boil, reduce heat, and simmer 25 minutes, until rice is cooked.  You can add broth and stir as needed to get a creamy, risotto texture, but if you're like me and have no idea what you're doing, nor what risotto is supposed to be, you'll probably skip the extra broth and be ok.  Season with salt and pepper.
  3. While the rice cooks, cut the meat from the bones and hack it into smaller, bite-size pieces.  Put the yogurt into the pan you used to cook the meat and cook over medium heat.  Whisk in the egg.  Add the meat and bring the whole mess to a gentle boil.  Reduce heat and simmer, stirring often, 15-20 minutes, until the yogurt is thick and creamy.  If the mixture is too runny, you can add the cornstarch and mix well.
  4. Toast the pine nuts and almonds in a little skillet 1-2 minutes, shaking frequently, until golden.
  5. Mix the crushed garlic and lemon juice in a small bowl.  Bethany serves hers for a whole table, but we have a small table, and two guests for dinner that night, so I made individual servings.  Put a round of Arabic bread (see below) on each plate.  Pour some of the lemon mixture over the bread, spoon on some rice, then some of the lamb-yogurt sauce.  Top with chopped mint and toasted nuts.
Bethany's picture is a whole lot prettier than mine, but she's done this before.


Arabic Bread
2.5 C bread flour (unbleached all-purpose also works)
1/2 t salt
1 t sugar
4 T olive oil
2 t yeast

  1. Mix flour, salt, and sugar in a large bowl.  Add olive oil and mix well.
  2. Add yeast to 2/3 C warm water and stir until it dissolves.  Pout yeast mixture into the flour mixture, a little at a time, combining it with your hands until a ball forms.
  3. Knead the dough on a clean, floured counter top until smooth and elastic (Maybe ten minutes? The more bread you've made, the easier it will be for you to gauge things like this by grabbing the dough ball).  Return dough to mixing bowl and score the top to relieve surface tension.  Cover with a clean, damp dish towel and let rise for about an hour.  It should double in size.
  4. Punch down, knead gently, and roll into a log.  Separate it into four equal pieces.  Roll out each dough ball into a round about 8 " in diameter.  You may have to flour your counter top.  Mine seems to be magical in this regard, perhaps to make up for the annoying color pattern (I can never tell when the damn thing is clean.  Or dirty.  It's maddening.)  Cover the rounds with a dish towel and let rest 10 minutes.
  5. Before you punch your doughball, preheat the oven to 450F.  Stick a cookie sheet in there to get warm.  When the rounds are ready, put one or two on a sheet (the book says one at a time, but two fit on my sheets, and I had four hungry people waiting for dinner.  One of those four was me, so I wasted no time putting food on the table) and bake 2-3 minutes, until the top and edges are slightly golden and a pocket of air has formed.  Once that pocket forms, try not to let them cook more than another minute, but that may not be as critical if you don't plan to consume all of the bread in the next hour or so)
The breads can be kept wrapped in a fridge 2-3 days, or in a freezer 1-2 months.  Allow half an hour to thaw.  Pop them in a microwave or hot oven to re-warm.

Thursday, June 12, 2014

something's fishy

Last year, when the Chief Taster finished paying off her school loans and declared herself free, I made her a celebratory dinner.  Popovers (possibly her favorite form of bread), chocolate chess pie (which I grew up eating, and she had never met before, but instantly loved), and this Hearty Seafood Stew.  I was very pleased with myself, and she made lots of happy noises as she shoveled her way into the bowl, so I think it went well.


I cheat a little when I deal with shrimp; you can usually find peeled, deveined shrimp at the grocery (I get mine from the freezer case near the fish).  I still get the raw shrimp, but I save myself a lot of work because... I don't yet know how to peel and devein the little sea bugs in an efficient manner.  I need to work on that.

Thursday, May 29, 2014

The whole enchilada

Yeah, I said it.

When I lived in Oregon, we had a COO who owned a share of a beef ranch and liked to go elk hunting.  Both of those are more popular than you might think, because Oregon is like that (he also was part owner in a well-known and high-end goat cheese dairy, but that doesn't fit with this story).  Each year, usually late in the fall, was my favorite holiday: Elk Day.  That's when the COO would show up at our office, and fill any coolers we had with elk chops, deer chops, elk round steak, deer round steak, ground elk, ground venison, and ground beef.  I lived alone, so I could make my supply last until the next elk day.  The last of my treasured elk was marinated on a camping trip; the last of the venison was an inauguration day meal.  I tell you all of this only to explain the joke: the first time I made enchiladas, they were elkchiladas, and they were fantastic.

Now I settle for beef, but last summer I decided I had made them enough to start experimenting, and devised the following Chicken Spinach Enchiladas.  Enjoy!

1 lb boneless, skinless chicken thighs, cooked and shredded
10 oz package frozen spinach, cooked and drained
1/2 C chopped onion
1/2 C sour cream
1 C shredded cheddar
2 T chopped fresh parsley*
1/4 t black pepper
1/3 C chopped bell pepper
2/3 C water
1 T chili powder
1 1/2 t chopped fresh oregano*
1/4 t cumin
1x 4.5 oz can chopped green chiles, drained
1 clove garlic, finely minced
15 oz can tomato sauce
8-12 tortillas (5-6")
shredded cheese, sour cream, chopped onions, or any other toppings you like

disclaimer: the original recipe I used as a starting point called for corn tortillas. I only used those once, and they pissed me off.  If you try to roll them around the filling, they break apart.  If you soak them in sauce to make them pliable, they shred apart.  They are horrible.  However, I once got into a heated argument with someone on Facebook over corn vs. flour tortillas, and it quickly became obvious that neither of us would ever back down from the position of "You're an insane moron with crazy, stupid opinions, and also wrong," so I just de-friended them and had a beer.  You can use whatever you want, as long as it's flour.  Because corn tortillas are horrible.  However, after the first draft of this post, I heard from someone else that if you fry the corn tortillas in oil, it makes them pliable without making them disintegrate.  I haven't tried it yet.
  • Combine cooked, shredded chicken with onion, sour cream, 1 C cheese, parsley, cooked spinach, and black pepper.
  • In 2 qt saucepan, combine bell pepper, water, chili powder, oregano, cumin, green chiles, garlic and tomato sauce.  Bring to a boil, stirring occasionally, then reduce heat.  Simmer uncovered 5 minutes.
  • Spoon a little sauce into the bottom of an 11x7 baking dish (or whatever nearby size you have handy) and spread it around to cover the bottom surface of the pan (I usually achieve this by gently shaking it side-to-side).
  • Did you pre-heat the oven?  You should do that now.  350F.
  • Spoon about 1/3 cup of filling into a tortilla, roll it shut, and place seam side down in the baking dish.  Repeat until you run out of filling.
  • Pour remaining sauce over enchiladas.  Bake uncovered about 20 minutes, or until bubbly, and the tortillas crisp a little.  Top however you like (namely, cheese and sour cream).


*PROTIP: when using fresh herbs, you need about three times as much as you would dried herbs.  There are three teaspoons (t) in a tablespoon (T), so if you are like me and pretty much never have fresh parsley laying around, and can't see the reason in buying a big package when you only need a little bit, de-capitalize the T and used dried instead.  (or, if it calls for some amount of fresh herbs in teaspoons, just divide by three.)

Thursday, April 17, 2014

El Pollo

Our grocery is usually a total madhouse at lunchtime, and again just after 5 on weekdays.  On weekends, if you don't get there first thing in the morning, it is often best to avoid it entirely.  I've gotten pretty good at finding all the things I use on a semi-regular basis, but being an adventurous sort in the kitchen means occasionally using new ingredients, which means spending a lot of time staring in aisles, trying to decode the complex and arcane methodology by which the local food mart "organizes" potables, a task regularly complicated by other people engaged in the exact same activity--or even worse, simply taking up space in the aisles while chatting with friends, poking at their phones, or staring fixedly at the bottom shelf while their cart sits abandoned twelve feet away.

I quickly reach a point where I grab jars that look right and hope for the best, which is how I ended up with whole artichoke hearts instead of those that were quartered, and didn't notice the mistake until I opened the can, and set about hacking at the vegetables with a knife, cursing my own inattention.

Spanish Chicken
1 3/4 lb boneless skinless chicken bits, cut into 1 inch pieces
1 lb turkey Italian sausage, cut into 1 inch pieces
1 1/2 C red bell pepper, chopped
1 C chopped onion
2 cloves garlic, finely chopped
1 t dried oregano
1/2 to 1 t crushed red pepper
1 can (28 oz) diced tomatoes, undrained
1 can (6 oz) tomato paste
1 can (14 oz) artichoke heart QUARTERS, drained
1 can (4 oz) sliced ripe olives, drained
3 C hot cooked rice (this can be made toward the end of cooking time.  It goes in bowls, not the pot)


  • Mix everything except artichoke hearts, olives and rice in slow cooker.
  • Cover and cook on Low 6-8 hours
  • Stir in artichoke hearts and olives; heat through.  Serve with rice.

 I also messed up and put the olives in early, but it doesn't matter.

Thursday, April 3, 2014

drinkable sandwich

Dad once found a recipe for Cream of Reuben Soup, which I may have mentioned in the past, but I never bothered to actually give you the recipe.  I like to leave 'em wanting more.

Cream of Reuben Soup
6 C chicken broth
3/4 lb cooked corned beef, chopped (you can use the deli meat if you can't get a real corned beef somewhere.  They're easier to find in March)
10 oz can, sauerkraut, drained
1 large carrot, peeled and grated
1/2 C chopped onion
1 garlic clove, minced
1/2 t dried thyme
1 Bay leaf (or two.  Two works.)
1/4 t ground white pepper (I've never found white pepper, so I just use black pepper.)
1/4 t tarragon
3 T cornstarch mixed with 1/3 C water
2 C (8oz) shredded Swiss
1 C heavy whipping cream
rye bread crumbs, toasted (go with rye croutons.  Chop the bread slices into squares, and toast them in batches on baking sheets in the oven.  Only toast enough to make a meal, because you want them crisp when they top the soup)

  • Combine ingredients above from broth to tarragon in large soup pot.  Bring to a boil over medium heat.  Reduce heat and simmer 30 minutes.  Remove bay leaf.
  • Combine corn starch and water, and stir smooth.  Stir into soup and bring to a boil, stirring constantly.  Cook and stir 1 minute.
  • Remove from heat.  Add cheese and cream.  Stir until cheese melts.
  • Top each serving with toasted rye cubes.

From the very first time Dad and I made this, it has remained one of my favorite recipes.  It's only fair that you have me over to try yours.

Thursday, March 13, 2014

It's what's stewed for dinner

This is one of the recipes the Chief Taster likes to use.  This time, when she suggested beef stew for dinner, I thought that meant I had the night off.  I was wrong.

Old-Fashioned Beef Stew (from an old Better Homes and Gardens cookbook)
2 T flour
12 oz beef stew meat, cut into 3/4" cubes (I have no idea how much beef I used, but I think it was closer to a pound)
2 T cooking oil
3 C vegetable juice
1 C water
1 medium onion, cut into thin wedges (I used about half an onion, because I think these older recipes referenced smaller vegetables)
1 T Worcestershire sauce
1 1/2 t beef bouillon granules
1 t dried oregano
1/2 t dried marjoram
1/4 t black pepper
1 bay leaf (I used my dad's rule of always adding an extra bay leaf. Nobody died.)
3 C cubed potatoes
1 1/2 C frozen cut green beans
1 C frozen whole kernel corn (instead of looking for these specific frozen vegetables, I used an equal amount of whatever frozen mixed veggies I had handy)
1 C sliced carrots


  • Put the flour in a plastic bag or a bowl with a tightly sealing lid.  Add meat cubes, a few at a time, tossing to coat and removing the coated cubes to a large saucepan or Dutch oven with the oil.  You may have to add a little more flour; I did.  Brown meat, drain if necessary, and add vegetable juice, water, onion, Worcestershire sauce, bouillon, bay leaf, and seasonings.  Bring to boiling, then reduce heat, cover, and simmer 1-1 1/2 hours, until meat is tender.
  • Add potatoes and veggies.  Return to boiling, then reduce heat, cover, and simmer another 30 minutes, until potatoes are done.  Discard bay leaf.  Eat.


Beef stew is meant to be a hearty meal, but for some reason, when I have a hearty meal, I want bread, too.  We didn't have any dinner bread at the time, and I didn't have the time to make any, nor the ambition for biscuits, so I took the easy way out and made some libum.  Libum is one of the oldest existing bread recipes, and my personal favorite for short-notice bread baking, but it's also a post for another time.  For now, suffice to say that if you make libum with gorgonzola cheese, you get green bread.

It's greener without the flash, but it's also too dark to tell it's green with just the overhead light in my kitchen.  Just trust me on this one.

Thursday, February 20, 2014

Buffalo buffalo Buffalo buffalo buffalo buffalo Buffalo buffalo.

I love that sentence.

I also love buffalo hash, which we usually make with beef (and, one time, elk), because it is more readily available and affordable than its larger, more hirsute cousin.

canola oil
kosher salt
fresh ground black pepper to taste
3/4 lb cooked buffalo meat, in small cubes
3 small potatoes, peeled and cubed
1 large carrot cut in 1/4 inch rounds
1/2 C green bell pepper, diced
1/2 C red bell pepper, diced
1 small onion, large dice
1 C corn kernels
1/2 C salted and roasted sunflower seeds
1/4 C ketchup
1/4 C coarse ground prepared mustard


The cookbook says to dump everything in a large skillet and cook, but I start with raw meat, so I cook that first, then add everything else.  Cook over medium-low heat, stirring frequently, until potatoes are done (give yourself half an hour of cooking time to be safe).  Remove from heat and allow flavors to blend (and food to cool) for 5 minutes before serving.  The book suggests
serving with fresh bread and pickles, and I have no reason to argue that point.

Thursday, January 23, 2014

Beau Thai

For a long time, we had a can of coconut milk in the kitchen cabinet.  Long enough that it has lived in at least two different apartments (which means the Chief Taster might have been living with that coconut milk before she was living with me).  Every once in a while, I would move it aside to get to something else and be reminded that I needed to do something with it, even if that something was just to move it to the back of the cabinet, out of my way.

When the Chief Taster discovered I could make chicken pot pie, it became one of the dishes which excited her enough to clap a lot when I suggested it, but it wasn't something she ever remembers to request.  One time, I suggested it, and she was thrilled at the impending pastry, but while I made the grocery list, I looked at the other side of the page in the BC cookbook, and saw Thai-Style Coconut Chicken, which requires one can of coconut milk.  It also called for serrano chilies; thanks to Dad's garden, we had a sack full of them in the fridge, waiting for a good use.  For a month or two, I'd slip a couple mystery peppers into whatever I cooked, and never told her about it, but the food was always tasty.

1 T vegetable oil
1 lb bite-size boneless skinless chicken chunks (I like to use thighs)
1 t grated lime peel
1 t grated ginger root (don't use ground ginger--they're not the same thing.  Peel the root before grating, and save the rest in the freezer.  It'll keep.)
1 clove garlic, finely chopped
2 fresh serrano chilies or 1 jalapeƱo chili, seeded and finely chopped (I used three serrano, but I think mine were a little on the mild side)
1/4 C finely chopped fresh cilantro
1 can (about 14 oz) coconut milk
1 t packed brown sugar
1/2 t salt
1 T soy sauce
1 C sugar snap pea pods
1 medium green bell pepper, cut into 1 inch cubes (that's what the book says, but anyone with a little math knowledge and experience with a green pepper will tell you that's impossible. Point is, big chunks of pepper are ok)
1 medium tomato, chopped (3/4 C)
1 T chopped fresh basil
hot cooked jasmine rice


  • Heat oil in wok or 12" skillet over high heat.  Add chicken and stir-fry until the chicken is no longer pink.  Add lime peel, ginger root, garlic, chilies, and cilantro.  Stir-fry 1 minute.

  • Pour coconut milk over chicken (it will come out in a big glob unless you do as the can says and shake the bejeezus out of it before opening.  Then, it still might come out in a big glob, but the heat will soften it and you can stir it in).  Stir in brown sugar, salt, soy sauce, pea pods, and bell pepper.  Reduce heat to medium and simmer 3-5 minutes, stirring occasionally, until veggies are crisp-tender.  Eat a couple to make sure.  Nobody will know, I promise.  Stir in the tomato.

  • Spoon into bowls of rice.  It will be almost like soup, but that's ok--a lot of Thai food is like that, and the broth is very tasty.  Top with basil.


Thursday, December 12, 2013

Rhinoceros

When I lived in Bend, a friend brought his family to visit for a few days.  We hiked to waterfalls, explored lava caves, and floated through town on rented inner tubes.  It was great.

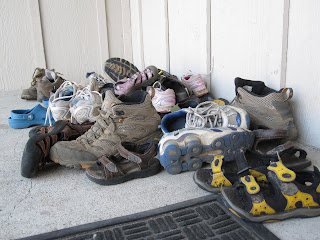
We made quite a shoe mountain on the porch after every hike.
I did my best to feed them during the visit knowing that there were three children, and an adult who doesn't "eat anything that swims."  I managed ok.  One of our dinners became a running joke; I had filled the Crock Pot before we left that morning, and when we returned, one of the kids asked what we were having for dinner.  Their dad told them "rhinoceros."  They didn't believe him, but then I extracted a large piece of bone, which happened to be shaped very convincingly like a rhinoceros horn.  "Sure it is," I told them, holding up the bone.  "See?"  I don't know whether the kids believed us, but when the mom posted on Facebook that we were eating rhinoceros sandwiches for dinner, she was immediately met with responses of "where ARE you??"

NOTE:  it wasn't really rhinoceros.  I like rhinos, and I'm very sad that the black rhino was recently declared extinct.  That's horrible.  But calling pulled pork sandwiches "rhinoceros" is too much fun to pass up, so the name stays.

The recipe is from Betty Crocker.

Pulled Jerk Pork Sandwiches
2.5 lb boneless pork shoulder (get it with a bone if you want to convince children it's rhinoceros)
1 T dry Jamiacan jerk seasoning
1/4 t dried thyme
1/2 C chopped onion
1 C cola
2 C barbecue sauce
sandwich buns

(If pork is tied or in netting, leave it in place for now)  rub jerk seasoning over pork, sprinkle with thyme.  Place in slow cooker and sprinkle onion over it.  Pour in cola.  Betty will tell you to to pour it over the pork, but that will wash away a lot of the seasoning you just applied, so I usually pour it down the side of the crock.  It'll be in there for hours; there's no chance of it getting too dry because you didn't dump a cup of liquid on top of the meat.

No rhinos were harmed during the making of this delicious meal.
Cover and cook on Low 8-10 hours.

Remove pork from cooker and put on a large platter or (my preference) in a big bowl.  Shred with two forks, and remove any netting or string.  Remove juice from cooker, reserving 1/2 C.  (You can set the rest aside and re-heat it for au jus style dipping, if that's your thing, but it's not mine)  Return pork and 1/2 C juice to cooker.  Stir in barbecue sauce.  Cook on High 30-45 minutes.  Serve on buns.  Watch Animal Planet.

Thursday, November 28, 2013

Night at the Improv, Part II

On the same afternoon I made the frankencookies, I decided to make stuffed peppers.  We had gone to an orchard that morning, and I bought three poblano peppers, and we had a little ground beef in the freezer.  The thing is, I had made stuffed peppers with Betty's recipe before, and I wasn't crazy about them.  So I made up everything on my own, thusly:

~ 1/2 # ground beef
1/4 # sweet Italian beef sausage
1 C uncooked rice
1 small tomato I found in the crisper
generous handful (about a cup, maybe a little more) grated cheddar
2 cloves garlic, minced
3 generously proportioned, full-bodied poblano peppers

Boil peppers 5 minutes to soften them a little.
Cook the rice.  I've found that despite the package directions, I get pretty good rice in about 25 minutes.  Halve the peppers lengthwise, keeping in mind they'll need to become bowls soon, so cut them to make deep pockets.  Discard stems and seeds, put the pepper halves in a pot, cover with water, bring to a boil, and cook five minutes to soften them a little.  While the rice simmers away at the back of the stove, cook the beef, sausage, and garlic.  By the way, is your stove in the corner, against a wall, like mine?  Does that force you to have pot and spatula handles in the middle of the range instead of off to the side, out of your way?  Did you fail to consider this, and leave a metal spatula handle sticking out of the meat pan where it could get heated by the pot boiling the peppers and burn the shit out of your hand when you grabbed it?  Put some ice on that.  When the meat's done, dice the tomato and toss that in there, too.  The rice should be done by now, if you planned well (and except for the spatula handle, I did), so you can add that and the cheese to the meat mixture and stir it all together over low heat.

Pretty much any meal can be improved with the inclusion of good sausage.
By this time, I had decided that I wanted to make popovers, too, but the popovers cook at two different temperatures (first high, then a little lower towards the end), and neither was where I planned to bake the peppers, so I compromised and set the oven at 375F.

Filled pepper halves, just before I baked them.  They didn't last long enough after baking to get their picture taken again.
Turn off all your burners and start spooning filling into pepper halves.  Set them in a glass baking dish.  I had a little filling left over, so if your amounts are all the same as mine, and your peppers are the same size, you might need four instead of three (eight halves instead of six).  I baked them about half an hour, maybe forty minutes, with the popovers.  Faked my way through the whole meal, and all of it was tasty.  I was really happy with how the peppers turned out, and felt even better about that because I really hadn't liked Betty's recipe the first time I made them.  However, I'd add some cumin and curry powder if I did it again (and I probably will).

Thursday, August 29, 2013

Bourbon Chicken my way

Fun fact:  Bourbon Chicken is named for Bourbon Street.  I found out when The Girl asked me to find a way to use up the bottle of bourbon we had before the last time we moved.  I also found out that when you search the internet for Bourbon chicken recipes, most of them don't involve any bourbon.  I kept searching until I found one that did.  (I also made some bourbon chocolate chip cookies that day, and sampled the product before finishing either, thus saving us from packing that bottle when we moved.  I'm a hero!)

The first time I made it, I actually worked from a hodge-podge of a couple different recipes, and it's evolved a little since then.  What follows is unique enough from the source material(s) that I feel comfortable calling it:

Ryan's Bourbon Chicken
About 2 lbs cut-up chicken
1 t ground ginger
1/2 C soy sauce
2 T dried minced onion
1/2 C packed brown sugar
3/8 C bourbon
1/2 t garlic powder (or one clove garlic, finely minced)
10 oz package frozen broccoli
1 C cashews


Combine ginger, minced onion, brown sugar, and garlic powder in a bowl.


Add soy sauce and bourbon.  Mix well.  Add cut-up chicken, turning to coat, and marinate in the fridge for a couple hours.

Always make sure you are using quality ingredients.  Re-check as needed.
This is a good time to check your bourbon for quality, freshness, whatever bourbon is supposed to have.  I just know I drink a little every time I make it because I can't think of a good reason not to.

About 30 minutes before dinner, pour the chicken and marinade into a large skillet over medium-low heat and stir occasionally until chicken is cooked.


When the chicken is cooked, add the broccoli.  Stir it in well so it gets heat from all sides.  It needs to thaw and cook, but as long as there is sauce in the pan, the chicken won't get dry--but the broccoli can get mushy if it cooks too long.  Keep an eye on it.  Sample a couple pieces if you want.  It's a vegetable--that means it's healthy (even if it's swimming in booze and sugar).


When the broccoli is ready, stir in the cashews and let them simmer a minute or two--you really just want to get them in there.  They don't have to cook, but it's good to get them coated in the sauce.


Serve over rice.  This one's a winner.